Showing posts with label Caldwell. Show all posts

March 10, 2021

Conversation between Dorothy Caldwell and Claire Benn--watch the livestream or catch up later

A special opportunity to see two superb textile artists in conversation with each other is coming up in a couple of days. I've been lucky enough to take classes with both Dorothy Caldwell and Claire Benn and am eager to watch this event. Dorothy and Claire work in abstraction, in close relationship with the land and its component elements. The conversation this Friday will be available both in real time, and then later on youtube.  Here are the details:

Friday, March 12, 4:00 p.m. EST

Link to the facebook page of Fibre Arts Take Two where the video will be hosted: https://www.facebook.com/fibreartstaketwo
Link to the YouTube live stream, where the conversation will be archived: https://www.youtube.com/watch?v=lbSWEfUADOE


November 13, 2013

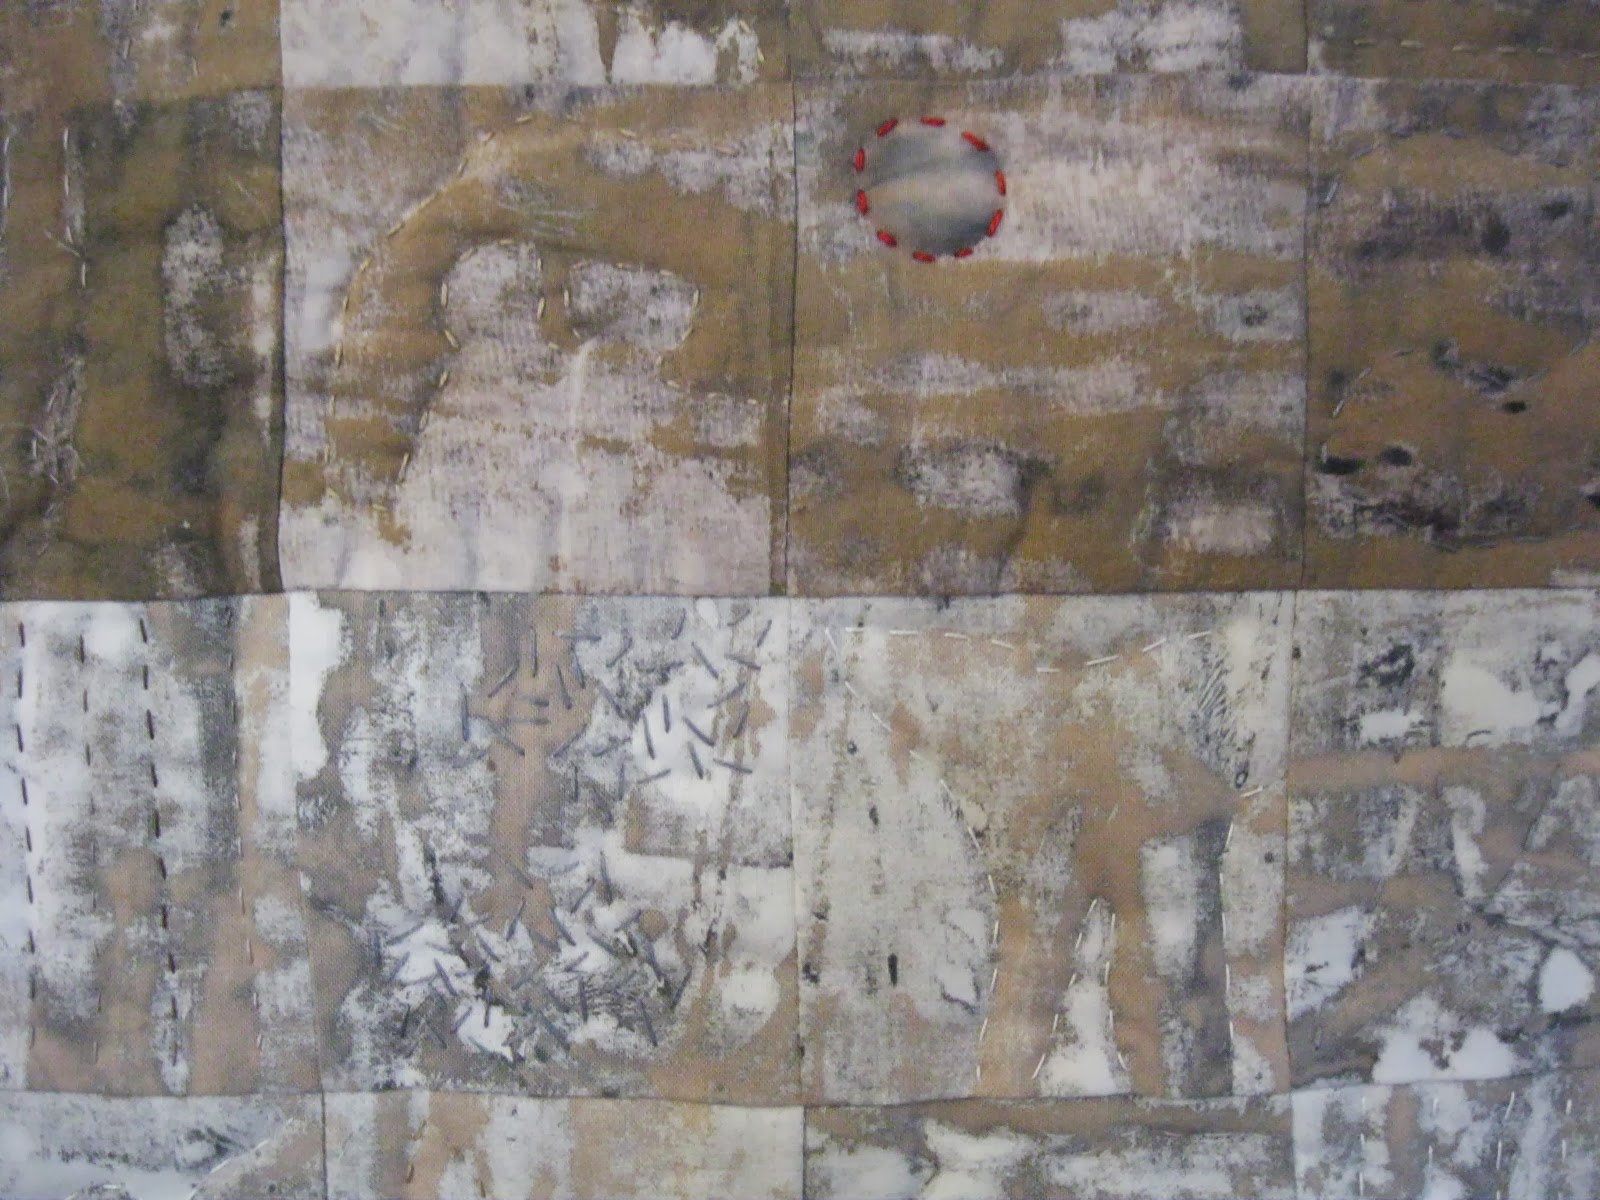
Stitch sampler on a deconstructed screen printing


One of the printing techniques I learned in a workshop with Carol Soderlund last October was "deconstructed screen printing."  It's a way of preparing a silk screen with various textures and thickened dye so that you get multiple prints from the one screen, but the pattern printed changes as the screen "deconstructs." You can also pull through different colors of thickened dye to further vary the prints.  (I've put a few links at the bottom of the post for anyone who would like to learn more about this type of printing.)

You can see the fabric as originally printed in this view of the wall with my work during the workshop.  the deconstructed piece is towards the center, right under my name, multiple prints going down a piece of fabric (click on photo to see this better):


I think I added another layer of grey and tan dye on parts of the cloth.  Then I cut it all up into 3-1/2" squares and played around with them.  Below is an early arrangement, which I later added more to.  This photo gives you a good sense of the patterning from the screen.  The linear element in the patterning came from string that I had placed under the screen.  The rest is the unpredictable result of this method.  Going with unpredictability is a good exercise for a structured/organized person like me.


Here's the final quilt, a nice size to hang on my studio door.


More details:


Some French knots too--


I do love this stitch:


Again, the Dorothy Caldwell workshop really changed how I approached quilting in this piece, which I worked on shortly after the workshop in May.  I didn't have a lot invested in this quilt, so I felt free to use it as a sampler, trying out various stitches, changing the stitch and thread from one small block to the other.  As it turns out, I like the eclectic result.

About deconstructed screen printing:
From Kerr Grabowski, the person who originated this technique:
http://www.kerrgrabowski.com/dsp.htm
http://www.youtube.com/watch?v=lZDtbLs4hEw
And a tutorial from Beth Berman:
http://sewsewart.blogspot.com/p/tutorials.html


November 12, 2013

Quilting Regret


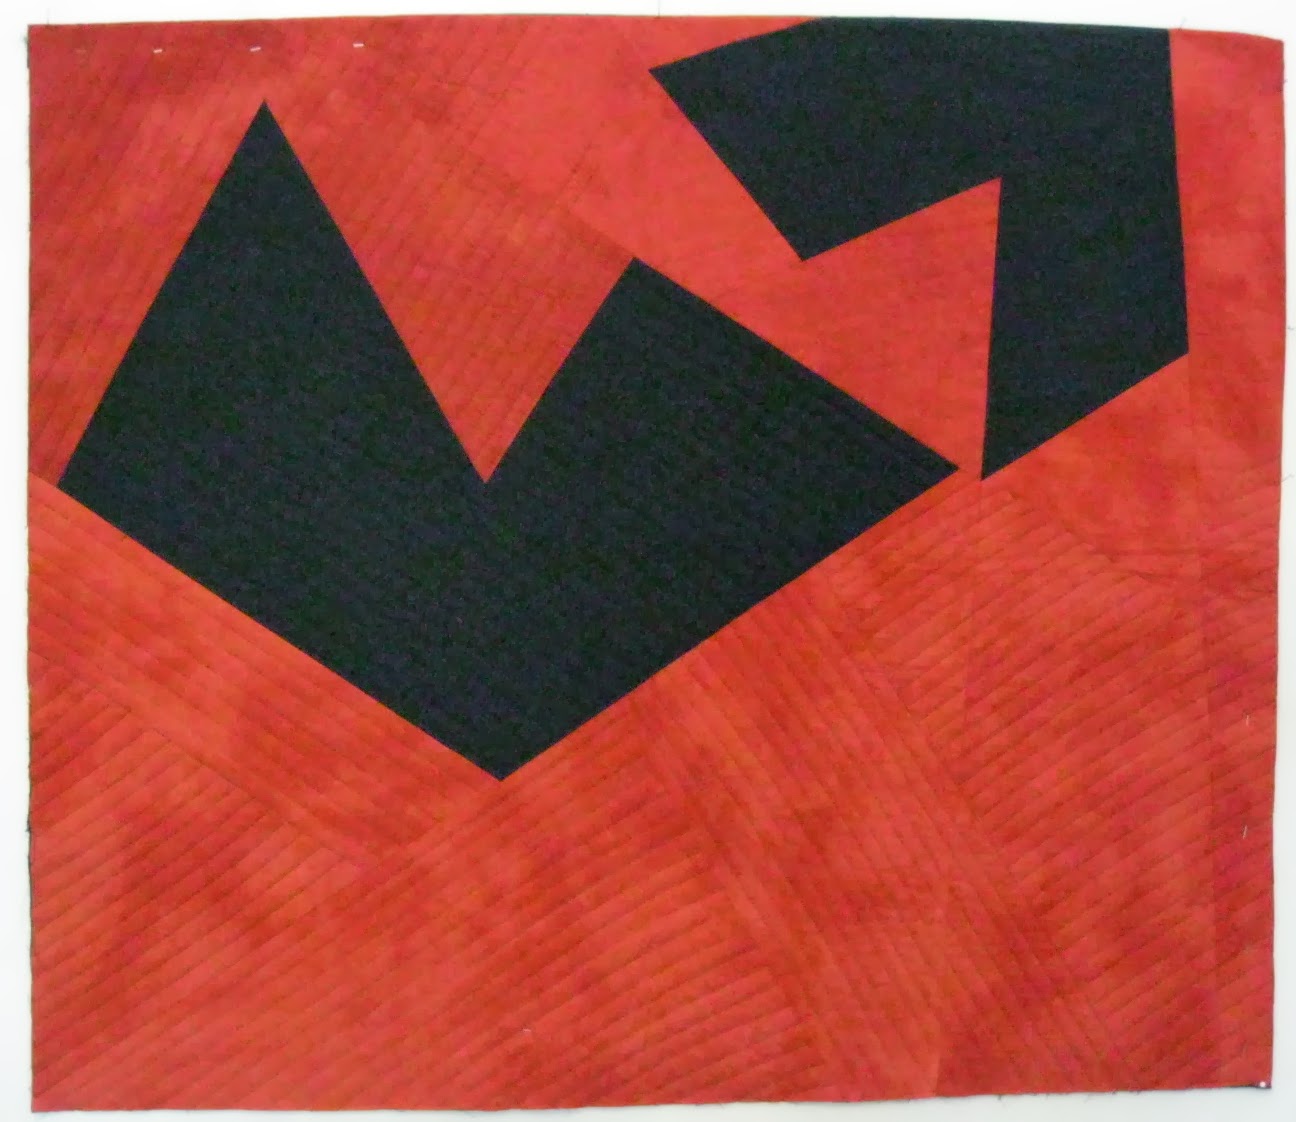
I finished piecing the top of "Regret" back in March, described here, where you can see the whole composition.  It took me a long time to figure out what to do about the quilting.  My working plan was to do straight-line machine stitching, which I felt to be in keeping with the starkness of the image/message.  Here's a small maquette I did, quilted in this fashion. (Figures in the final version are placed slightly differently.)
But I couldn't figure out what to do in the black figures, which I thought should be quilted differently from the background.  I was also considering parallel lines going in just one direction through the whole quilt, maybe diagonally.  I had considered hand-quilting, but didn't want the "softness" of look/feel one gets with hand-stitching.  And part of me felt, "I've been working on this quilt long enough.  I want to get it over with, and machine stitching will be so much quicker."

Then I took Dorothy Caldwell's workshop on "Human Marks" last spring.  One of the exercises in the class led me to a stitch (improvised, done while blind-folded, to the word "dialogue") that I've come to think of as my "conversation" stitch.  I tried it out in a small sampler piece (stitched on an entirely different project), detail below.


I decided that this stitch would be meaningful to use in this quilt about regret, which, after all, often comes from missed conversations, or conversations gone awry.  I began the stitch in the black areas.  I liked the way the stitch looked on the back side of the quilt as well, so in the red areas, I've done the same stitch, but worked from the back.  Here's the corner of the quilt that I've quilted so far.  (Ignore the long blue stitches--that's just basting to hold the layers together).

A close-up of the stitching is the top photo in this post.  I've used an occasional black thread in the red area.  I may or may not keep it in--I'll see what I think when more is stitched.  Very easy to remove if I don't like it (one of the benefits of hand-stitching--machine stitching is much more difficult to remove).  I may also try a little red stitching in the black.  The thread, by the way, was dyed to match my hand-dyed fabrics, just lightening the black into charcoal, so that it would show up on the black.

I wanted to keep the quilt as flat as possible (easier with machine stitching than hand-quilting).  I tried stitching just through two layers of fabric, no batting at all (which is how many of Dorothy Caldwell's pieces are done), but I found I missed the sense of weight as I held the fabric on my lap.  I tried a couple of thin battings, but one was not thin enough, and the other "bearded" (bits of batting work their way through the fabric).  I ended up using just a layer of black flannel in the middle--thin, easy to work with the needle, but still gives me the weight I like to feel as I hand-quilt.

Below is the back of the quilt, before quilting.  One of my other quilting ideas had been to write out in machine-stitching the regrets that have fueled the making of this quilt, and I made a list of them to prepare for that.  But when I did trials of the quilting, I found it not satisfying--one can't be as fluid in machine stitching words (especially over such a large surface as this quilt, about 60" wide) as one can in writing by hand.  I decided instead to incorporate the words by writing them on the back of the quilt, and I'm happy with that choice.  Rather than writing in straight lines across the whole quilt, the sentences are written out in sections.  To obscure the writing, I overlapped the lines a little bit.  Words are still sometimes legible, but it is difficult to read more than a word or two in a row, even for me.


Many thanks to my fellow students at Dorothy Caldwell's workshop, whose diverse and beautiful work have so inspired me--and who also coached me through the process of dyeing thread, which I hadn't tried before.  And thanks to Dorothy for her total love of mark-making, and for the encouragement to slow down, and to look at the back of things.

. . . . .

It might be that machine stitching in parallel lines would have been a better choice for the final appearance of this quilt, and it's not impossible I'll do another version that way some time.  But sitting with the quilt for the months it will take to finish this, maybe letting some of my regrets dissipate a bit along the way. . . it's been the right thing for me to do.


October 5, 2013

A new life for my mother's knitted cotton bedspread?


Some years ago, my mother knit this cotton bedspread for me.  She loved to knit, the more complicated the pattern the better.  I used the bedspread for some time, but eventually put it aside.  It is quite heavy, and difficult to manipulate on the bed.  But a few weeks ago, I decided I was tired of the quilt I had on the bed, and pulled this out, to see if I'd want to use it again.


Alas, I discovered that there were a number of large holes in the spread, not just the stretched areas where blocks come together (easy to repair), but other places where the thread had unravelled within a block.  I must have washed the quilt with bleach, trying to remove a few small stains, one of which is visible towards the center of the photo.  The bleach not only didn't work on the stain, but I think it continued to eat away at the fabric.  Having done a little discharge work using bleach, I now know how important it is to rinse the bleach out of the fabric with anti-chlor, not just water, as the bleach will otherwise keep working away.  I've been thinking that I would do the best I could to "darn" the holes closed, but I've been putting it off, reluctant to do the work when I'm not sure I would enjoy the bedspread (for the same reasons I stopped using it before).  I thought about cutting the bedspread up to use for something else, but could think of no garment or other item that would work.

Then today, I got another idea when reading India Flint's book Second Skin: Choosing and Caring for Textiles and Clothing, which I picked up to follow up on the element of Dorothy Caldwell's work that has to do with mending and re-purposing fabrics.  Maybe I can cut out the blocks of the bedspread, stitch them onto another fabric, and put them back together again in some way as a bedspread.  Having a more stable fabric underneath will make the bedspread easier to handle (though will add to the weight).  To lessen the weight, I could make the whole thing somewhat smaller, or use fewer knitted blocks and add plain fabric between them.  India Flint's book mentions repurposing old linens, which I have an enormous supply of (inherited from my mother and my aunt)--maybe I could use some of these for the backing.  I pulled out a linen napkin, and did a quick trial, without cutting anything from the spread.  I've placed the napkin on the back of the spread:


Here's a close-up of the quick running stitch I did.  It's invisible on the front.


I need to think about this quite a bit more before making the irrevocable move of cutting into the spread. Any thoughts/ideas would be most welcome.

Here's another photo of the bedspread, showing how four knitted squares are sewn together into a large block, and also a bit of the scalloped border.


Here's the pattern my mother used, Mrs. Coolidge's Great-Grandmother's Counterpane (double-click on any photo to enlarge):


Here's a close-up of the end of the pattern.  yes, 216 different rows in each square.


And lo and behold, the pattern is available on the great knitting site, Ravelry:
http://www.ravelry.com/patterns/library/grace-coolidge-counterpane-motif


July 1, 2013

Giveaway winner

Congratulations to Barb, who won the pillowcase giveaway!  Barb, I'll send you a separate note about choosing a fabric.

Thanks to all who sent in a comment.  I know from the stats on blogger that there are more of you out there--I guess pillowcases are not as popular as I thought they would be. . .

Can't leave you without a photo.  Here's a preview of a detail from a piece I'm currently finishing up, more before long:


May 28, 2013

A week with Dorothy Caldwell


I spent a week earlier this month in a workshop with Dorothy Caldwell at Nancy Crow's Barn.  The name of the workshop was "Human Marks," and we spent the week making a variety of marks on paper and fabric, with all sorts of implements/methods.  The final project was to make a small book with the products of some of these exercises, plus anything else we wanted to add, and to do that we also learned a simple book-binding method.  The workshop was both stimulating and fun, and it was a great group of people--more diverse than most workshops, as it drew people from a variety of backgrounds, including people whose main work was in weaving, collage, installation, dyeing, quilting, and more.

The small pieces on the left (the shorter ones, about 4x13") were done by putting soy wax as a resist on fabric and then discharging color with bleach.  The four smaller pieces all started out as black fabric (top two on a black that discharged to tan, and the bottom two on a black that discharged to yellow, the lighter background from leaving the bleach on longer.  The long piece on the right started out as orange, discharging to black.  My favorites are the top two on the left.  Upper left done by stamping wax on with a stamp I made by glueing string to a wooden block; upper center done by brushing on wax.

 This is a small segment (about 8x10") of a piece done by putting a very large piece of paper on the ground, taping a brush to a 3-foot long stick, dipping it in India ink, and painting.  The big piece then got cut up to make a book.

We spent a day learning about kantha embroidery stitching, and the rest of the week worked on small pieces.  I've wanted to learn this, so was glad for the opportunity, but the intensive work was hard on my hand, so I didn't get too far.  Dorothy has spent time with women who do this work in Bihar, India, and had a number of pieces to show us--quite amazing.  You can see some examples here.

 Here are a number of the small books that students made as a test of the binding technique, made by cutting up the paper we'd used as a desk-protection when doing various exercises.  (Double-click for a larger view.)  The two with lovely black and white covers are Dorothy's own samples.  Mine is towards the center with the turquoise spine. I really loved making this little book.  I used to study medieval books, so I've long known what a "signature" is in bookbinding.  But I'd never made one myself.  Something very appealing about putting the signatures together and weaving the threads for the spine.  I may be looking for things to put together into little books. . .

Much of the week was spent in alternation between working very carefully (bookbinding, kantha) and working without control (painting with a long stick).  One of the most interesting exercises in working with less control was in blind stitching:


We cleared our tables, threaded up five needles and laid them to the right of the fabric.  Then we each put on a blind-fold.  Dorothy would read out a word related in some way to design, and we were to make a row of stitches with that word in mind.  I love what happened in my second row, where the word was "dialogue."  My intention was to make two stitches close together, but sometimes I couldn't remember if I'd done one stitch or two, hence some triplets as well as the pairs (detail below).


I can imagine working with this stitching motif in some way in future projects.  It will be interesting to see if I can make the stitches with this combination of order and casualness if I have my eyes open. . .

One of the major lessons I took away from the workshop was reinforcement of the idea to slow down and look carefully.  To be open to accidental beauty.  To look for serendipitous adjacencies/relationships (this last most in play when we were making our books, looking to arrange pages with interesting juxtapositions).  For example, on one of my cloth-book pages, I sewed a trapezoidal piece of fabric I had brought with me.  But when I turned the page, I found I was more enchanted with the line of stitches that showed on the back:
Thank you Dorothy, and thanks to all my wonderful classmates!