Showing posts with label applique. Show all posts

September 28, 2019

Too many projects

I really like working on just two projects at a time--one main project that involves significant brain power, and one that is easier.  Earlier this year, my focus for several months was Jeremy's wedding quilt, and the work felt very good. But as I got closer to finalizing that design, I felt I needed a break from it, and it happened that I needed to prepare for a workshop I was doing for several friends in late August. So I turned my attention to preparing samples of monoprinting and screen printing and writing up instructions for the several processes we'd be doing. Here's a photo of some of the monoprinting samples. Unfortunately, I didn't take photos of the work people created at the workshop, which was stunning.


Once the workshop was done, I took two different directions--finishing up assorted small quilting projects, and starting two new hand-stitching projects.  The hand-stitching projects took precedence over a return to the wedding quilt, because in mid-October I'll be getting together with several people in Utah to camp, hike, and stitch, and I wanted a couple of small but challenging projects to bring with.  I'll post about those projects before long.  First, a round-up on the projects I've been finishing up.

One of the daiwabo projects is close to completion. I'm now sewing on the binding on this table runner:


After testing out about 8 different ways to quilt this, I ended up with simple in-the-ditch quilting. This puts all the focus on the fabrics.  

I'm also finishing the binding on a bed-runner for a friend who recently re-modeled her bedroom, including laying a strip of parquet flooring in a pattern just like a "rail-fence" quilt block. Fabrics were chosen from the stash of my friend Carol, and the two of us pieced the blocks--a fun project for us to do for our mutual friend. 


I mentioned a while back the Palette Stacks panel from Marcia Derse that I'd purchased. I decided to make it into a whole-cloth baby quilt. Here it is basted up, ready for hand-quilting. No rush on this, just a nice project to have by the couch when I want to do some simple hand-quilting.


Just as I was thinking about what to do for a backing for it, I came across this sweet pattern for a "Tiny Tile Quilt" from Purl Soho.
Tiny Tile Quilt from Purl Soho website
I wondered what it would look like to do this pattern in a variety of all bright colors, including the white "snowball" shape that reads as a background when done in just one color.  I made up nine blocks, and then surrounded them with larger pieces of solids, all hand-dyed fabric I had on hand.


I liked this enough to decide it deserves to be a top of its own, so I dyed up some solid red fabric to be the back for the Stacked Palettes instead. The new snowball top is folded up in the closet; I will leave choice of backing and quilting until I need another baby quilt to give to new parents.

Finally, having finished the hand-quilting on the appliquéd quarter-circles, it was time to bind that, so I dyed up some medium blue and put the binding on.  The hanging sleeve is now pinned to the back, waiting for its final bit of hand-sewing.


I've got a few more days of hand-sewing to finish these up, and then I can focus on the stitching project for the Utah trip. I look forward to having fewer projects in the works.

May 25, 2019

Back in the studio

With prepping my studio for painting, putting it all back together again, and then a two-week trip to France, I was out of the studio for all of March and April. Once I got home, I spent a couple of weeks working on small projects, but then a week ago, I put Jeremy's wedding quilt blocks back up on the design wall, and have been working steadily on it since.  I start each day making a block and building up my supply of smaller units. It feels good to be working on it again, and I now have enough blocks up on the wall that I can get a sense of the overall impact.  I am happy with the direction it is taking.


The quilt will be about 60" wide (the width between the two strips of blue painter's tape on the design wall) and about 90" long (marked by the strip of tape on the heat register at bottom left). Right now I have 29 blocks, all cut to 10.5" high, but with varying widths. The blocks are not yet sewn together. I am thinking about placement as I put finished blocks on the wall, but there will be a good deal of adjustment once all the needed blocks are sewn.

I did complete one small top in early April, at a four-day retreat in Chicago with my friends in Quilters by Design:
42 x 42"

This started as a "travel appliqué" project, made with my hand-dyed fabric, and using the design of quarter-circles that I made in another quilt, described here (interesting to see how different the same design can look with different fabrics). For a year or two, I carried around gray squares with basted circles. When they were done, I cut them in quarters and sewed them back together. I chose colors based on my bedroom--this may end up as a wall-hanging for that room.

And here's an account of the small projects I completed after I got home from France:

First up, I spent time designing and basting a new travel appliqué project. I like to have appliqué to do as handwork with me when I travel, but there are requirements: it has to be relatively small, and it has to be working with complete single shapes, not layering one shape on another. I had such a project with me in France, but it was something I had done before--a repeat of a Japanese crest design. It happened to be a relatively challenging piece (many very narrow pieces), and that, along with the fact that it was something I'd already done, added up to a not very enjoyable project.  When I got home, I actually threw it out, about 1/3 completed. I was highly motivated to have another project lined up before my next trip, whenever that may be.  I decided to something along the lines of this quilt, done about 10 years ago from a purchased pattern:


I decided to go with just rows of applique, no striped borders. I sketched out a design in Photoshop, experimenting with shapes and colors, and figuring out the dimensions


I kept the dimensions as designed, including placement of narrower rows, but did further fiddling with shapes and colors. The shapes are now all basted onto rows of yellow fabric. This way, I can take a couple of rows of fabric with me on a trip. I'll sew the rows together once the appliqué is done. 

will finish at 36 x 42"

Hmm, looking at this photo, I think I may need to un-baste the orange triangles and place them a little further apart.

Next I finished up a small "structured improv" quilt that I started at the quilting retreat, using an improv method that Jill Guffy taught to us.
36 x 42"
Then I finished a round table mat for my sister, to go with some placemats I made for her last year; it just needed trimming and binding.

diameter 29"

And then I spent a few days making a large supply of luggage tags--a fun way to use up small pieces of fabric in my stash. I like to have a supply of these on hand, and I had just given away my last one. Usually I make about 10 at a time, but it always takes me a while to warm up and remember how to make them efficiently, so I figured I would just keep going, and I ended up with close to 4 dozen.

17 different fabrics

44 tags total
And soon after my return, I sandwiched up the half-circle applique project (including dyeing some gray fabric for the backing) and started hand-quilting it. Right now I'm doing a grid of ditch-quilting in the seams, and will likely add additional lines of quilting in two directions in the middle of each small square. Each day after breakfast, I do about 20 minutes of hand-stitching, before going up to the studio. Soon it will be nice enough to do this outside on our back deck--it just has to stop raining. . .


April 18, 2018

Appliqué top completed


Above is the final pieced top made with the appliqué squares. (Cropping makes it look a little tilted; it's not.) I spent yesterday using Photoshop to try out a number of lay-outs for this quilt, narrowing it down to four possibilities.

A) 4 vertical squares, pushed left


B) 4 vertical squares, centered
C) 4 rectangles
D) 2 x 2 squares


Much as I liked the idea of getting more color in by using horizontal rectangles of colored fabric (layout "C"), I think the simple square works best. Of course, Christy Marnell, designer of the Posh Tot quilt pattern, had already figured that out :-)  This will be a generous-lap-size quilt, about 57 x 77".

I had been thinking I would put a 2" frame of color around each square, but that resulted in a quilt that was bed-size instead of lap-size, and I didn't want to go that large.  So I tried layout "D" which I could do with larger borders.  Nice, but not as striking as layout A.  I solved the size problem by going to colored frames of just 1-1/4" wide, with a separating black sashing between the blocks of 1".  The blocks themselves are 15".  Done!

Now I'll put this aside, and go back to the triangle quilt, which needs a back and then quilting.

April 14, 2018

A four-day quilting retreat

Each year, a group I'm part of, Quilters by Design, meet for a four-day retreat where we discuss our work and do a lot of sewing. The people in the group have all done design workshops with Weeks Ringle and Bill Kerr, so we share a common vocabulary and approach to the design process. It's great to have dedicated time to sew, to share the time with friends, and to see how a quilt design can be transformed once response and suggestions are heard from a group of creative folks.  For example, I brought with me a quilt that was in the early state of the design process.  I had finished five large appliqué blocks, using a pattern that showed the blocks laid out for a 40x40" wall-hanging.

"Japanese Gingko" by Roxanne McElroy
This has been my "travel appliqué" project for a few years, more important to me for the process (having  easy-to-transport hand-work when I travel) than for the finished product.  As I was finishing up the last block, I learned of a wedding in August that I'll want to make a quilt for, and it occurred to me to use these blocks to make a quilt, rather than a wall-hanging. My only thought was to keep the blocks in the layout shown in the pattern, putting them on a quilt-sized background (about 55x75). Mary Beth and I had a fabric shopping trip planned, so I brought along a block, and I found a batik that we both thought would work for the background.

When I got home, I laid out the blocks on the fabric, and played around with the possibility of adding colored sashing.  This was as far as I had gotten when I left for the retreat. I packed this up, thinking it would be a good thing on which to get some feedback.


Well, of the six others at the retreat, none of them thought the black/gold batik worked for the background fabric. I explained that I didn't want to do plain black--didn't seem appropriate for a wedding quilt. I had some extra fabric in the bright colors of the applique, and wondered about adding them into the mix, perhaps large triangles separating the blocks. Had I thought of any other layouts for the blocks, they asked? No, I was just going with the layout suggested in the pattern. Then Janis suggested, "What about a layout like 'Posh Tot'?" This is a pattern available from Blue Underground Studios, the company of one of women in our group, and many of us have made the pattern. (I've used it a number of times for a baby quilt.)

"Post Tot" by Christy Marnell, available from Blue Underground Studios
This suggestion quickly led to the layout below.  So much better! I never would have thought of this on my own--a great reminder of the usefulness of sharing work in a group critique. (The black/gold patterned batik will now be used on the back instead of the front.)


There's a way to go yet to finalize the design, but mostly issues of proportion and arrangement of colors (though I think this arrangement works quite well). Laid out this way, 4 blocks makes a good-sized quilt; the fifth block (lavender) will probably go on the back of the quilt. It's just as well I only need four for the front, because I have only a small scrap of the lavender fabric left over, and have not had luck finding another length of the same color batik.

The main sewing project I brought to the retreat was to put together the blocks I'd finished for another quilt, made from a pattern in Rebecca Bryan's Modern Triangle QuiltsHere's a photo of the pattern from the book:

And here's my version (finished top only):


This quilt is a wedding gift, with colors chosen by the couple.  To get the background just the blue they wanted, I hand-dyed that fabric and the lighter blues; most of the other colors are commercial solids.

Although the quilt has the look of improvisation, the blocks were actually all done according to specific instructions in the book. I wasn't used to working with triangles, so I thought I would start out with Bryan's instructions and then improvise from there, but the triangles were challenging to work with, so I just kept following the block patterns worked out by her.  Ten of the blocks are paper-pieced.

After I finished piecing this top, I made 4 pillowcases for David and me (two each of the ones below):

I also cut out the pieces for a baby quilt that's been in my drawer for a while. And I learned a nifty way to make square-in-a-square blocks without having to cut any pieces. I've written up a tutorial and will post that shortly.

So, a very productive four days for my own projects, and a delight to see what everyone else was working on and talk through design issues in those also.

August 7, 2017

Using prints that are white with one other color


For a couple of years now, I've been buying fabric that is white with just one other color, in a range of "other colors"; the bin above shows much of it. I started out thinking that I would make simple nine-patch blocks with the fabrics alternating with white, and made up some sample blocks, but wasn't thrilled. I kept my eye open for other possibilities, and finally landed on this quilt by Kate Conklin that uses a variable-sized rectangles spaced with white.  I made up a sample with my fabrics, adding an occasional solid color to replace a white spacer.


Then, before I got going on this, I was looking for something to make into an applique project that I could easily carry around when travelling. Since most of the fabrics have dominant white background, I could precut a simple shape, baste it to a square, and only have to bring white thread with me, rather than trying to match all the colors.  I started with variations on a square shape, but didn't like any of these:


I switched to circles.  I cut up several dozen and brought them on a couple of trips.  I enjoyed the sewing, and I liked each circle individually, but when I put them all up on the design wall, I didn't like the overall look.


Here's a quilt of appliqued circles that I made about 12 years ago.  This one works because there's more unity across the circles.  


I could have tried limiting the fabrics (one with just black and white would be quite nice), but I wanted to find a way to use the range of colors.  I decided to cut the circles up into quarters, and mix things up so that different colors were in closer proximity to each other.  My first arrangement was to put four different fabrics into a new circle.  (A kind of pointy circle, because of the seam allowance taken up in the piecing.)


I liked this, but wanted to do something else to get movement across the design, rather than isolated circles.  Here's the next thing I tried:


I showed this to Mary Beth, and she suggested another variation that makes a more continuous chain, and that was the winning design!  I like the resulting quilt very much.  This is a baby quilt, 42" square.  


I sometimes used a solid color for the background, and sometimes I used the print as the background and white or a solid color as the arc.  The faint numbers you can see below are the chalk markings I made to insure that the order of blocks on my design wall didn't get lost as I sewed.  This is the only way I can trust that things won't go awry.


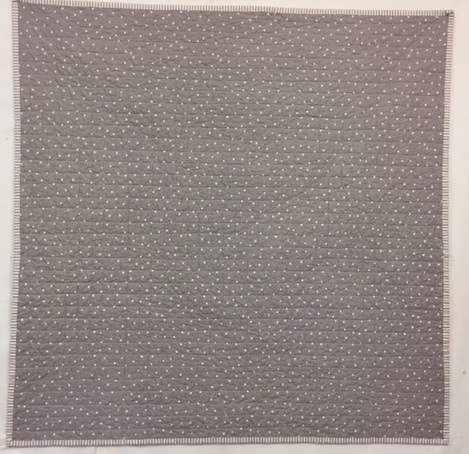
I used a gray striped fabric for the binding, influenced by Rita Hodge, who frequently uses a striped binding on scrappy quilts.  And for the back, I used a piece of yardage I've been saving.  I rarely buy more than a half-yard for fabric if I don't have a specific use in mind, but I so loved this gray fabric with little squares that I bought three yards of it some years ago.  Time to use it!


And now that this quilt is done, I've started arranging rectangles on the wall for a second quilt. A good friend's son is expecting twins in a month or so, and these quilts are being made for them.  I like the idea of using the same fabrics for the two quilts, but doing a different design for each.


August 20, 2011

Table runner-rectangular appliqué


I like to have handwork with me when I travel. I put together these simple blocks, playing with solids and scraps of batik. I intended to make a baby quilt, but I'm having too much pain in my hand from doing applique, so I called it quits and made a table runner (12 x 32"), which I'm quite happy with. I cut the batik rectangles by hand, and I like the way some sides are a little curvy, and angles are not necessarily 90 degrees. It's also a satisfying way to use up bits of fabric on hand. I'm going to try out some methods of machine applique, and perhaps do more of these blocks, but eliminating the hand sewing.

I tried out various fabrics for binding, and like this one that has both lavendar and gray in it; not a fabric that appears in the blocks, but it ties things together nicely. (Click on any of the photos for a larger view.)


When putting together the blocks, I just paid attention to the color of the solid background and the colors and shapes of the two rectangles on that particular block. Then, when putting together the table runner, I moved the blocks around until I found something pleasing. If I do this again, I think I would try laying out the solid blocks, and then laying out the rectangles on top. More work up front, but a more direct way to the composition.


Again, I did just the straight-line quilting, about 5/8" apart. Done!


March 9, 2011

Appliqué decisions


Here's the decision I made about the colors for the narrow inner border and the applique, incorporating helpful suggestions from Cookie and from Mary Beth. I knew I wanted to include more red/orange somewhere, and kept trying it in the applique flowers, but Mary Beth's idea to go more monochromatic in the applique (so as not to compete with the center of the quilt) led me to move the red to the inner border (Cookie's preference). I wanted more variation than all dark blue for the applique border, so tried out medium blue flowers with everything else darker blue. I'm happy with this. Except that even with visits to two quilt stores, I didn't find a medium blue that I'm entirely satisfied with; I only have a few scraps of the fabric from the one medium blue block. I think I will hold off on cutting the shapes until I have a chance to try another store or two. This will hold things up, but I'd rather wait and get the color right. Oh, the other helpful suggestion from Mary Beth: "Is it for yourself? If so, please yourself!" Yes, I've decided to keep this for myself, and choosing so that I like it is, indeed, easier than choosing "what is best."

When putting the blocks together for the quilt, I had a couple of extra blocks. One I was happy to just put aside, as it wasn't a very interesting or appealing pattern. But the one below didn't belong for a different reason--the pattern was too different in style. But definitely a keeper. So, I decided to make it into a small wall-hanging, just adding a narrow inner border and a wider grey border.


I think I'll hand-quilt this, as well as the larger quilt. If you like this pattern, check out Garden City Gateworks--it's one of theirs.