In my last post, I mentioned that I had embarked on a stretch of doing simple sewing, and I showed a number of samples of quilt patterns I was considering. Thanks to those of you who wrote back with your favorites! I decided to make Katie Pedersen's "Cross the Border" quilt. (Katie's blog, Sew Katie Did, is one I've been following for a long time, and I highly recommend it.) I followed her design closely, using a hand-dyed fabric for the background and a variety of prints, about half of them from my scrap bins and the rest clipped from yardage on hand. It's satisfying to make a quilt without having to buy any new fabric.
 |
| "Cross the Border" pattern by Katie Pedersen, Sew Katie Did blog; my version is about 35" x 45." |
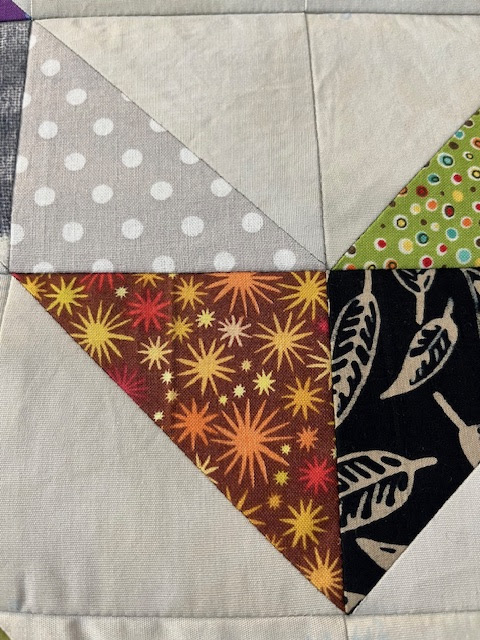
A regular zig-zag is a standard quilting pattern, but I love Katie's energetic version of it, with the variation in the beginnings and ends of the lines--brilliant! I also followed Katie's lead in using a wide variety of prints, in both color and pattern. With this many different small pieces (over 150 different fabrics), you can get away with more variety than if you're using a smaller number of different fabrics. For example, I wouldn't think of making a quilt with just the four fabrics below, but they look just fine as one of many (in the top line of the quilt).
One of the pleasures of making a scrap quilt like this is looking through one's stash of fabrics, and coming across fabric from past quilts. The green check below is from the first quilt I ever made, with Katie Ortner.

I've made several zig-zag quilts before as baby gifts, but I've always taken the easy way out and used rectangles for the units. (If you click on the photo to enlarge, and look at the solid pale green fabric, you can see how the rectangles are laid out.)

After making Katie Pedersen's version, I don't think I'll ever go back to rectangles. Half-square triangles take more time, but I loved mixing up the fabrics in each zig-zag.
Given how much I enjoyed working with the HST (half-square triangle) blocks, and while the fabric was pulled, I decided to do a sampler quilt, showcasing a variety of patterns you can make with this simple combination of two right-angle triangles. I kept in a zig zag (upper left in photo below), but then did eight other traditional blocks. This top is about 40x40".

And my HST playtime continues. I'm now working on a more free-form design, using a palette of colors and pale neutrals chosen by a friend of mine. I'll post more once I've got something to show.