Showing posts with label shot cotton. Show all posts

August 8, 2015

Work and Play

Working on pieces like "Accident" is just that--work.  These deeply personal pieces are challenging and difficult, both in the conceptual/emotional process that leads to a design and in the construction of the quilt.  For most of these works, the thinking process takes years--how best to convey my idea in the design?  The construction is quicker, but still, it takes months to figure out how to construct the design that I've come up with and then to complete it.  This kind of work is satisfying, especially in those moments when I hit on a design that I can say yes to, and when a construction technique I've come up with or tried out works just as I'd hoped--or leads me to a new solution.  But it is not fun.  I have to push myself to keep at it.  Break it into small chunks that I can handle.  It helps to have something on hand that I can play with when I take a break from the big work.  I just have to be careful not to get sidetracked into making the play an occasion of procrastination from the work.  With "Accident," there are stretches of time where waiting is built into the process, so that gives me a chance to play freely for a while.  Here's what I've been doing with my playtime recently: the photo below shows the first four rows of the center section of the pattern "Walk in the Park," by Bill Kerr and Weeks Ringle:


Here's a photo of their pattern, published in American Patchwork and Quilting, June 2015:


I've had a collection of Kaffe Fassett striped shot cottons on hand for over ten years, and I'd been keeping my eye out for possible ways to use them.  About six months ago, I decided to make hourglass blocks from them, and when at a four-day quilting retreat in March, I made several dozen blocks, all with two fabrics in each block, sometimes a solid and a stripe, sometimes two different stripes.

I liked the blocks individually, but couldn't come up with an arrangement that I liked, whether a mixture as above, all solid/stripe blocks, or all stripe/stripe blocks.  I set aside the project.  Then, about a month later, I saw the Kerr/Ringle pattern and I knew that would be a great solution--have the hourglass blocks be all stripes, but break them up and border them with a solid.  Also, the pattern suggests four different fabrics in each hourglass, so I decided to try that also.  The photo below shows a few rows with four different striped fabrics in each hourglass (top) and a few rows with two different fabrics (bottom).  I decided I preferred the version with 4 different fabrics.


Although the blocks are shown above with solid blue, my first thought was to use green.  I had a sample of the apple green on the right below, and I thought this would be a good use for it.  I do like how that looks, but it was more contrast than I wanted for this particular piece, so I added some blue to the formula for dyeing the fabric and came up with the fabric on the left.  
 I liked the feel of this combination better, and was going to go with it, but in the end realized that I just didn't like that color green very much, and decided to try a blue instead.  I tested out five different values of a premixed indigo blue color, and tried out the blocks.

I chose a medium value, and am happy with the choice.  Here's a photo with a large piece of the blue underneath the rows I've completed.  (In the final piece, the solid will be on the sides, as in the published pattern.)

Well, as you can see, there's a lot of thought and decision-making that goes into even following someone else's pattern!  But now I'm at the stage of just sewing together block after block, just what I need for the occasional break from "Accident."

Side note for those interested in Photoshop Elements:  My six-week class with the Pixeladies is now over, and I'm trying to find occasions to practice what I learned so I don't forget it all.  I used it for two of the photos in this post:  In the photo of the pattern, I typed the pattern information onto the photo, and backed it with a non-opaque rectangle so that the words would show up better.  The photo of the two green fabrics side by side was created by putting two photos together into one new file.  I do highly recommend their classes.  They plan to do a revamp of their Fabric Design class in winter 2016, which I'm looking forward to.


December 26, 2014

Changing the stitching on "Plain Spoken"

Back in May, I made the decision to quilt my shot cotton "Plain Spoken quilt with embroidery stitches.  In the months since, I scoured embroidery books for a variety of usable stitches and began the stitching.  I enjoyed learning the embroidery stitches; it is quite amazing how holding the thread one way or another, or placing the needle here or there, can create a wide variety of designs.  But after doing about 80 different stitches, I decided I didn't like the way it looked on the quilt.  Too much variety of color, value, and pattern--all of which distracted from the flow of color in the quilt.   (Ignore the loose white stitches--that's just basting that will be removed when the quilting is done.)


And a close-up, with basting stitches removed.  No better.  

So I decided to go back to something simpler, and did trials with various weight threads in either a simple running stitch, or the "conversation" stitch that I used on my Regret quilt.  


I decided on the conversation stitch (thanks to Mary Beth for the suggestion).  I'm using two threads, a dark, dusky blue 20 wt pearl cotton (hand-dyed) in the darker strips, and 2 strands of 50 wt Aurifil sewing thread in a pale yellow-green in the lighter strips; varying between the two holds down the value contrast between thread and fabric.  I think this is better.  


The quilt is also secured with in-the-ditch hand-quilting in all the vertical seams, done before I began the embroidery.


May 11, 2014

Embroidery!


I recently finished piecing the shot cotton "Plain Spoken" quilt.  The next step was to figure out what I wanted to do for the quilting.  On an earlier shot cotton quilt, made from just the larger-size rectangles, I machine quilted a grid, and then added hand-quilting with embroidery thread, a simple line inside each rectangle.  I thought of doing similar hand-work on this quilt, so I tried it out on the sample above, right column.  Too boring, and the narrower rectangles needed a different treatment.  I've been wanting to expand my embroidery repertoire, so I decided to play with some embroidery stitching instead (working it through the three layers of top, batting, and backing, so that it serves as quilting as well)--done in the middle and left columns above.  I love how this looks!  So, my plan is to do vertical stitch-in-the-ditch in the seams between each column to secure everything, and then to do embroidery in the narrow rectangles (0.5 x 3").  I won't do any stitching at all in the larger rectangles (1.5 x 3").  It will take me a year or two to complete, but it will be a pleasure to do.  There are 1,440 narrow rectangles in this quilt, and I'm thinking I'll try to do something different in each one.  I've been going through embroidery books, picking out stitches that will be usable for this project, and so far have about 150 different stitches (e.g., back stitch, lazy daisy, French knot, etc.).  Since many of these stitches can be used in multiple ways, I think it's possible to come up with 1,440 variations, especially since the straight stitch (example in lower left corner above) is basically a short drawn line, so there are as many variations as one could make with a drawn line. . .

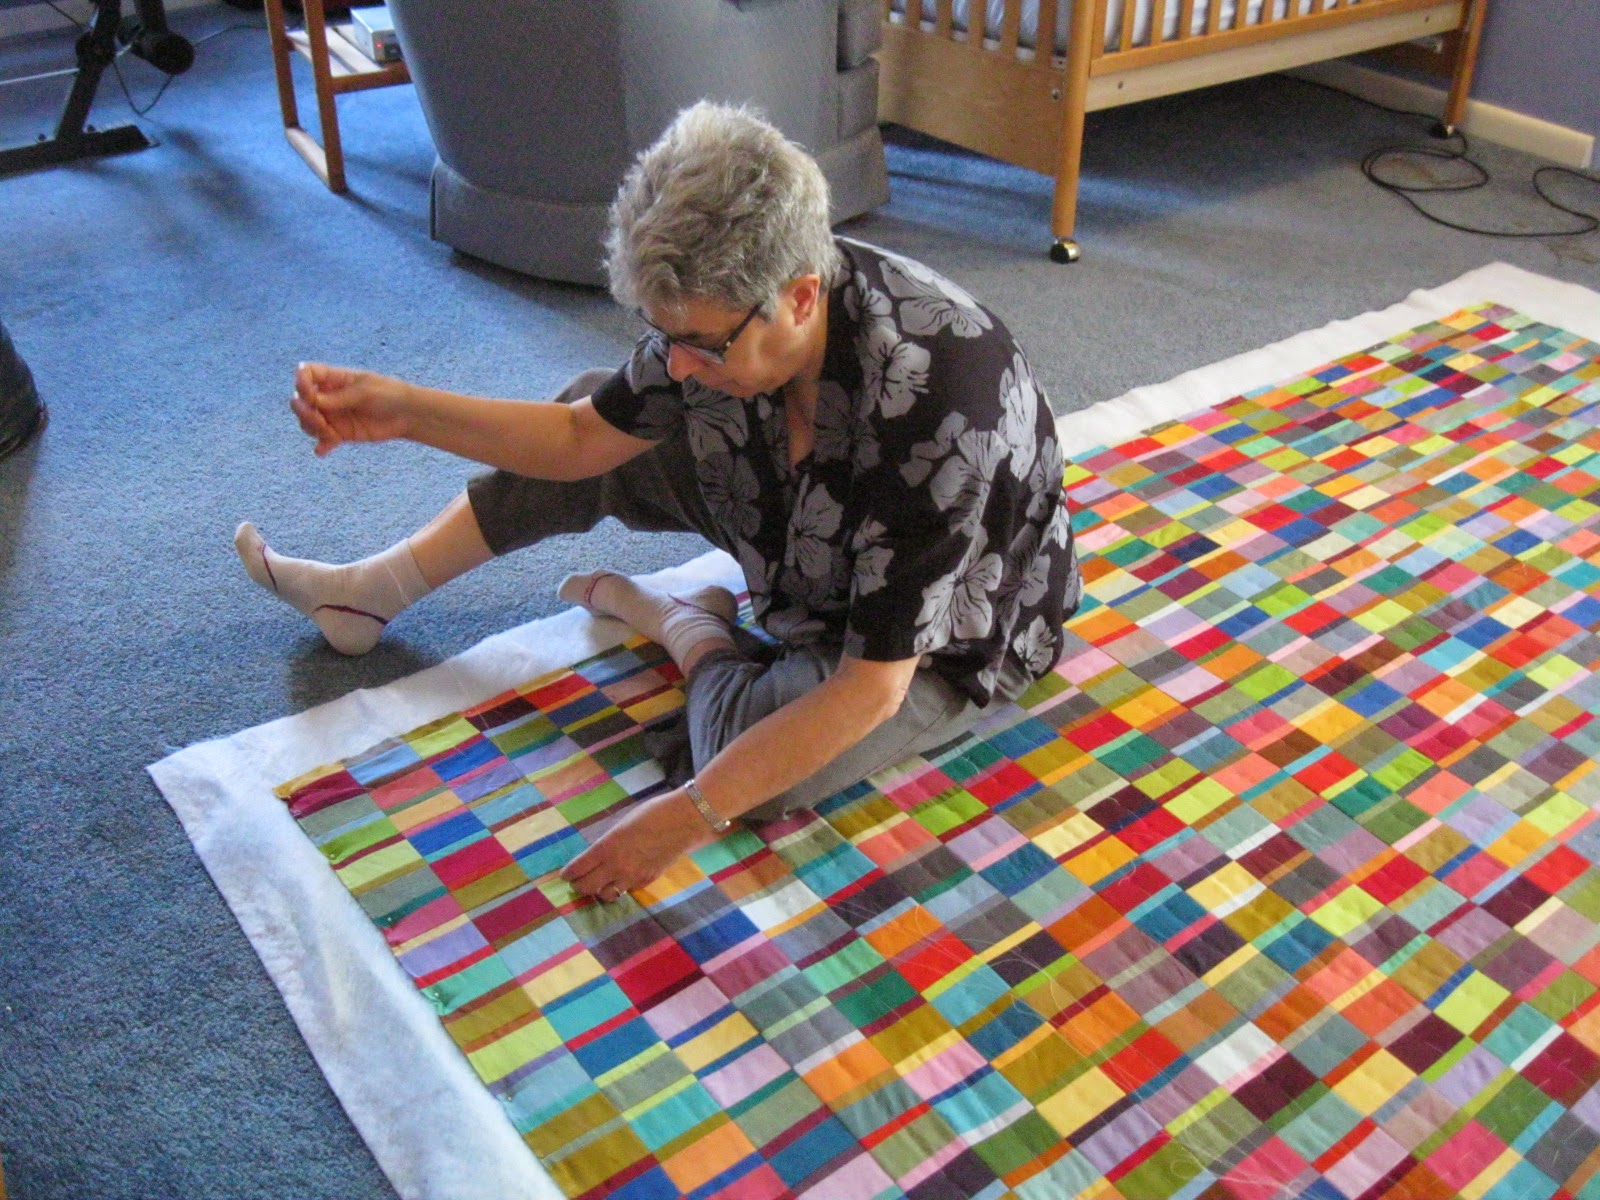
With a quilting plan in place, the next step was to baste together the three layers of the quilt.  I usually secure the layers by spray-basting, with the layers pinned to a vertical design wall--a method I learned from a Patsy Thompson video.  But this quilt is 90 x 112 (for a queen-size bed), and the spray-basting works best for something smaller, and for something done by machine rather than hand-quilting.  I decided to baste this on a low-nap carpet, a method described by Suzanne Marshall in her book Take-Away Appliqué, pp. 78-79.  I have a large carpeted area in the finished attic of my house that I could use.  First, the back gets pinned to the carpet, all around the edges:


Then the batting is smoothed out onto the backing.  (For hand-quilting, I use Hobbs Poly-Down.)  Then the top is smoothed out over the batting and secured with pins around all the edges.


Then, you sit on the quilt and baste it!  I've never tried this before, as I couldn't believe the quilt wouldn't shift from my moving around on it, and I also thought it would be a strain on my back.


But it has been working well.  I do only a half-hour at a time, twice a day.  After a week, I'm about half-way through.  I'll have to up the number of stints to three times a day, as I've got a guest coming into the guest room on Friday!

I'm stitching in the middle of every column, and in the middle of each row of larger rectangles.  It's a pleasure to be looking at all the color combinations close up.


December 24, 2013

Playing with shape and color-2


The second project I'm working on between stints on the art quilts is a version of a  pattern by Bill Kerr and Weeks Ringle, "Plain Spoken," published in their book Modern Quilt Workshop.


I've had my eye on this pattern for a long while.  A couple of months ago I was looking at the many extra 2" x 3.5" rectangles I had left over from this shot cotton quilt.  Much as I love that quilt, I decided not to make it again, but to try something new, so I looked around for other patterns for which that size rectangle would work, and Plain Spoken came to mind.  I cut some of the rectangles I had in half, to get the narrower strips.  Each of my two-piece units finish at 2 x 3", while the Plain Spoken pattern has units that finish at 4.25 x 7.5."  So, the proportion is a little different as well as the size, but I think it still works out fine.  I'm piecing nine of the two-piece units into a block.  I need 158 of these blocks for a queen-size quilt.

Here are all the colors I had to work with.  I eliminated the white (top left corner), but used all the rest.


In this project, the shape was pre-determined by the rectangles I had on hand and by the pattern.  But lots of color to play with!  Here's an example of how I worked up the units.  I took a pile of larger rectangles all in one color, and then paired them up with a variety of colors in the narrower piece.


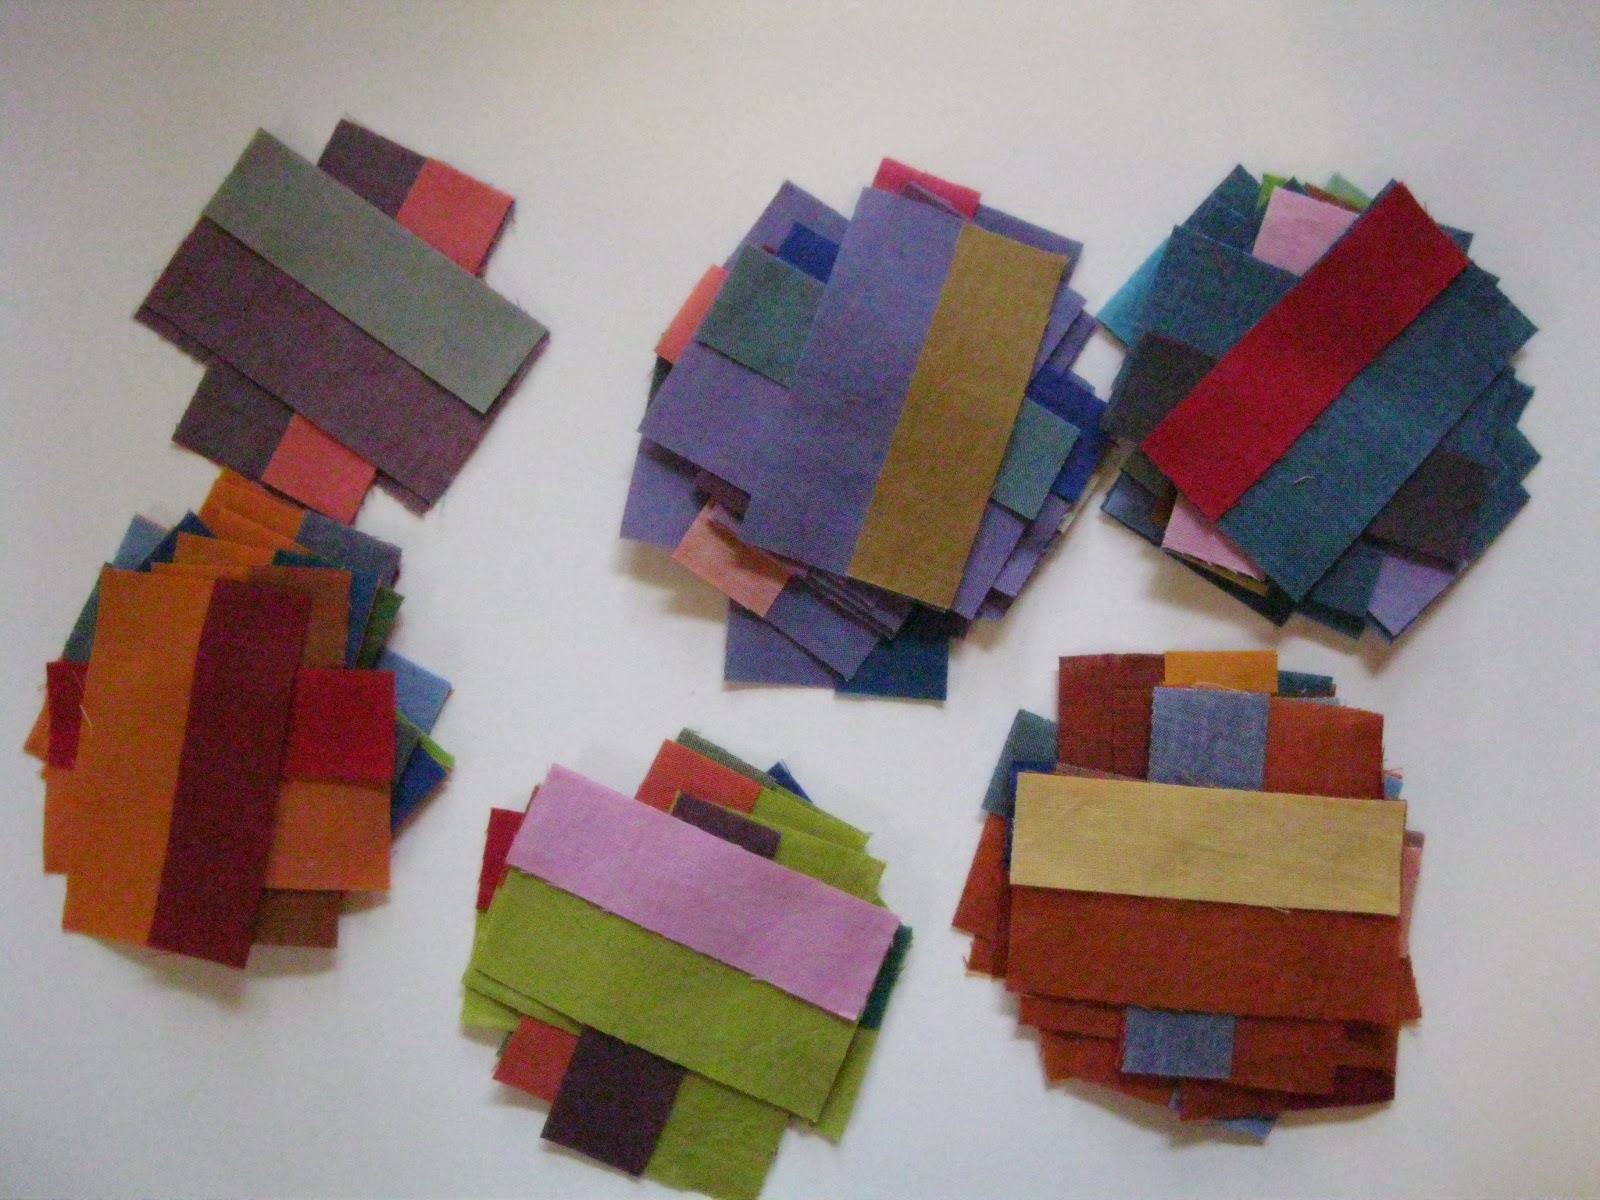
Then I made piles of units according to the color of the larger rectangle and sorted also by value.  


I would browse the piles to come up with nine units that I thought would work together.  Here are some stacks of nine units, waiting to be made into blocks.


And this photo shows all 158 blocks.  The pile on the left has been trimmed up so all are the same size.  The larger pile is yet to be trimmed--not the most fun part of making a quilt. . .


Once the trimming is done comes another interesting part--putting all the blocks up on the design wall and deciding on final placement of each block.  I composed each nine-unit block to have a variety of hue and value.  Will I be able to avoid awkward adjacencies when I put them all together?  I made about 10 extra blocks beyond the 158, so that adds flexibility.

For those of you who aren't familiar with shot cotton, here's a close up.  The warp and weft are usually done with two different colors, creating a lovely complexity in this "solid" fabric.


February 10, 2013

More about the hand-stitching


I usually have at least one project in progress, set up by the comfortable couch in our living room.  Right now, I'm working on the hand-quilting that I'm adding to the machine stitching on the shot cotton quilt.  A sign of how pleasurable this work is:  I have found myself thinking that I don't want to finish the quilt quickly, so that I continue to have the stitching to do.  I love choosing each new color as I move from square to square.


 And I love seeing how the thread looks on the two different rectangles in the square.  Simple pleasures.


At this point, I'm about half-way done with the hand-quilting. 

January 21, 2013

Tray dyeing and some quilting decisions


To make a backing for my shot cotton "Spectrum" quilt (see here and here), I decided to experiment with tray dyeing, a method of getting multiple colors on one piece of fabric that I hadn't tried before.  I've very happy with the results.  I picked up three color samples at the paint department of Lowes, and then used my swatch book from Carol Soderlund's class to match up a dye formula.   As you can see below, I got very close indeed! 
I was especially pleased because the dyeing circumstances were not ideal.  My dye concentrates were a couple of months old, including two weeks not refrigerated.  I did the dyeing in the basement, with an ambient temperature of about 58 degrees.  Many dyers don't do dyeing if they can't get the temperature up to 70 or warmer, but this convinces me that colder temperatures work just fine.  I did leave the dye on the fabric for 24 hours before washing out; if it had been warmer, I could have done a wash-out after four hours.  The other not-ideal factor was that I was using a fabric that doesn't take up the dye as well as the standard fabric I use for dyeing, so I just eyeballed putting in more dye on the lighter two colors; the darker blue looked fine when wet, and it did turn out dark enough.  The photo below shows my dyeing set up.  I happened to have a couple of long flat cardboard boxes from the butcher.  I cut out one end of each and taped them together into a long tray, then lined it with heavy plastic.  I doubled over the fabric, so the dark blue ended up in the center and the green on both ends.  I didn't intend for any white areas to be left, so I'll be more careful with that the next time.  I stapled the plastic down in the cardboard to have a smooth surface.  Unfortunately, that mean that some dye leaked through.  The cardboard is too warped to use again, and I messed up the surface of the pingpong table.  Well, live and learn.  There are a couple of other options for trays that I can try the next time I want to use this technique.


 Once I had the back sandwiched to the front, the next decisions were about quilting.  I decided to do straight-line quilting in two directions. (Click on this and other photos to see larger.)


This seemed not enough to me, but I didn't want to put more lines of machine stitching on the quilt--too harsh for the softness of the shot cotton.  After a number of different trials, I decided to hand-quilt the inner squares with a long stitch, using 2 strands of a variety of embroidery threads.  I'm staying with the color of the two rectangles that make up the inner square, but choosing for some contrast in value.  (Click on the photo to see this larger.)
I'm enjoying spending the extra time with the quilt, having the chance to look closely at every square.

October 31, 2012

Top complete


I finished piecing the top today.  I wanted to give some close-up photos, to show the range of colors in the shot cottons.  They are really beautiful.


And the whole top:

Some sources for shot cotton:
I bought my fabric from Glorious Colour, $9.50/yd, 71 colors, also available in sets, with a new full set coming out late in 2012.  Also stripes.

Other sources carry the fabric also, but either less of a selection or a higher price:
Hancock's of Paducah, $8.98/yd, 19 colors
Portsmouth Fabric, $9.95/yd, 50 colors and a few stripes
Purl Soho, $10.60/yd, 56 colors

October 25, 2012

Playing with value and color


A couple of years ago, I made a baby quilt from a pattern called "Spectrum" by Judy Turner, from her book with Margaret Rolfe, Successful Scrap Quilts from Simple Rectangles.


I really enjoyed making this quilt, for which I used a range of shot cottons.  It was both relaxing and engaging to make the choices of color and value.  The quilt is made up of many rectangles, all cut 2"x3.5".  They are arranged into squares, with either two light rectangles as the center, or two dark.  My sister liked the quilt as well, and I agreed to make a larger one for her.  She stood me to a collection of about 50 1/4-yard cuts of shot cotton, out of which I am getting a lap-quilt for her, and something else for me as well.  It was a great treat to get this huge variety of shot cotton.  I ordered it from http://www.gloriouscolor.com/, but they don't seem to have this big collection anymore.  Anyway, the blocks at the top of the page are the ones I've just finished up for my sister's quilt; I've been working on the blocks on and off for about five months--a nice project to have on the side, doing a few blocks when I need a break from something else.

When I had all the blocks done, I separated them into two piles, light and dark centers, and then just put them up on the design wall in the order of the pile.  Every once in a while, if I noticed two in my hand that looked too similar, I chose another in the pile, but that's it.  I expected to then do a lot of tweaking, moving blocks around to get a good arrangement of color and value.  But I think I might leave it just as it is!  I could tweak endlessly, but this is pleasing now, so maybe I can restrain myself and leave it alone.

I also checked the value distribution by taking the photo in black and white as well.  Digital cameras are a real boon to quilters! 

Even without black and white, looking at the photo in the camera--where it is much reduced in size--helps one see value distribution.