December 21, 2015

Dyeing more neutrals for "Stones"

My first blog post on stones was written in April 2009, so I've been thinking about this subject matter for a long time now, and have tried out a variety of approaches with small-scale tests.  But I haven't yet found the method/composition to settle on for a large-scale project.  Back in September, I thought through directions I could go, and came up with eight possibilities, and am especially eager to explore two or three of them.  Now that Accident II is finished, I'm able to give full attention to developing these projects.  For any of them I will need a large supply of fabric dyed in appropriate colors.  Here's my supply of neutral-colored hand-dyes, as of January 2014, when I did a systematic dyeing of gray, taupe, tan, and cream, described in this post.


I'm especially interested in using gray, and I don't have enough range of hue.  I did some dyeing last week to explore other grays.  In the photo below, the top row is a color recipe that came out gray when I dyed it two years ago; I repeated it to get a gradation of values.  But this time it came out tan rather than gray, either because of the age of the dyes (a few years old), or because I made a mistake in measuring.  Oh well, a nice tan to add to my drawer.  The second row is a value gradation done with a new gray dye powder that is a pure color, which is unusual.  Generally, both brown and black (and from them, tan and gray) are made from a mixture of three primaries: red, yellow, and blue.  But this new product is just one color by itself, which means it will never split into the component colors as some of the mixtures can tend to do.  It is also a nice neutral gray, which is not easy to achieve with mixtures.  The bottom row is an array of six premixed blacks (from Prochemical Dye), diluted into the gray range, compared to a 7th (on the right), which is a recipe from Carol Soderlund.  I'll do a value gradation of the most promising of them.  For the dyers amongst you, I've listed the numbers of the ProChem blacks in the caption.  Added to the grays I figured out from the dye run two years ago, this should give me enough of a range for the project.

Bottom row, from left, Prochem #628, 629, 604, 610, 610 plus 1/6 the amount of Strong Orange, 602A, Carol's black.


And here are the results of testing out a variety of fabrics for hand-dyed napkins.  These are all as they emerged from the dryer, as I want to use a fabric that does not necessarily need ironing.


From the left:

  1.  Kaufman Patina, 100% cotton, done as a control for color uptake, as I know it dyes very well.  It also came out of the dryer with few wrinkles.  If I end up using cotton, I will likely go with this, rather than the Roclon Nature's Way muslin I used in earlier trials.
  2. A linen/rayon "hopsack" blend from JoAnn Fabrics.  Good color uptake, and not badly wrinkled, but probably too heavy for a napkin, and the edges frayed badly.
  3. A linen/rayon blend from Dharma Trading Company.  Less color uptake, pretty wrinkled, and fabric is not as soft as I would like for a napkin.
  4. A linen/cotton blend from Dharma.  Poor color uptake, but everything else is good--not wrinkly, feels soft, heavier than cotton but still very nice for a napkin.  It will be difficult to get dark colors with this one.
  5. A linen/rayon blend from JoAnn Fabrics that has an embroidered pattern sewn into the cloth.  Good color uptake, but wrinkled the most of any of them.

So, I'll likely use Kaufman Patina or the linen/cotton blend.

December 20, 2015

Accident II

I think Accident II is finished; recap of previous steps here.  Final size: 57x91. I overdyed the right edge so that there is color out to the edge all around.  I layered the top on a plain black backing, no batting, the two layers sewn right sides together and then turned for a plain edge.  I had planned to do simple stitching throughout, a running stitch following the diagonal line of the image, changing thread colors to blend with each area.  I was looking forward to having the piece on my lap for the months it would take to do the stitching.  But the more I look at the piece up on my design wall, the more I feel it's complete as it is.  I've long had it in mind that this piece is a kind of banner, and I think free-flowing cloth is more appropriate to that.  Stitching would interrupt the flow of the words and of the cloth.  I may do some stitching on a smaller trial piece I have from earlier stages, to see if the decision sticks.  Comments/suggestions welcome.

I will be having a show in Galesburg sometime in fall or summer of 2016.  My plan is to hang Accident I and II next to each other.  The first (below) is there for the viewer to stand before and read each word; many design choices were made with this purpose in mind, including its overall format as a page of text.  In front of the second, where the viewer will need to step back to take in the whole, my intent is that the viewer, knowing the content of the words, can focus on the emotive content.


December 19, 2015

Setting a table


I've had time to work on some small projects while I wait for two successive overdyeing stints on Accident-2.  I saw the photo below of fan-shaped placemats on the GE Design blog--a great shape for the round table we have in our kitchen.  


There weren't instructions in the post, but I figured out a pattern and method, starting from some wedges of Marcia Derse fabric that I had leftover from a tablerunner:
I had some mottled hand-dyed fabric on hand that worked really well for the binding.
I liked these two placemats quite a bit, but didn't have enough Marcia Derse fabric for more, and I need four placemats for the table.  I had some Daiwabo fabric leftover from another project, and decided to use that for four more placemats.  I also re-sized the wedges so that there are ten in each placemat rather than seven.  I didn't have enough dark fabric for all the bindings, which is why two are done with light fabric.  Might have been better with all four done in the light fabric, but also fine as is.  I will enjoy using these when we have guests for dinner. 

(Close-up in top photo of this post.)
I've also been working on making napkins from hand-dyed cloth.  We use fabric napkins all the time at home--I've been making them for many years.   I also sometimes give them as house gifts.  I was converted to cloth napkins in 1975, when I was a boarder at a student dormitory run by nuns in Angers, France, where I was doing dissertation research.  One of the requirements was that I bring two cloth napkins.  They were stored in a drawer in the dining area, and you picked yours up before every meal.  When one was dirty, it went into the wash and we used the other.  It had never occurred to me to use the same napkin more than once.  Growing up, we used paper napkins for everyday.  For special meals we used linen napkins, once only and then laundered and ironed.  Part of the discovery was that cotton napkins don't need to be ironed if you smooth them out when they come out of the dryer.  The ones I make have always been from commercial printed fabric, but I thought it might be nice to personalize them more by using fabric I had dyed myself.  My first thought was to dye them as I did bandanas this summer, like these:


But I also thought a napkin would be a good place to use some of the embroidery stitches I practiced when I thought I would be putting a variety of stitches on one of my shot cotton quilts.  So, I've been testing out stitches that might work well for border designs (you can double-click on any photo to enlarge):


And dyeing up samples to see if I can find a range of six colors that I'd like to use.  Here's one set of samples.  Not happy with these, so I will be trying out some others as well.


I'm also testing out a number of different base fabrics.  I found an inexpensive muslin that has a "beefy" hand, nice for a napkin, but it's pretty wrinkled when it comes out of the dryer.  Right now I have several different linen blends (with rayon or cotton) in the dye process, to see whether any of them might be a good option.

And a while back I also finished the crayon quilt I posted about in October.


When I cut the scraps for this quilt, I cut enough for a second quilt as well, so I can give this one away knowing I can easily make another.


October 31, 2015

Getting back into the studio: A crayon quilt

I'm easing myself back into the studio, playing with scraps of color for a baby quilt.  I'm working from this pattern from American Patchwork & Quilting.  Who wouldn't like a reminder of the pleasure of a new box of crayons?

American Patchwork & Quilting, Supplement to an issue sometime in the last year--sorry, no date given on the pages

The pattern calls for piecing together 2.5" strips of assorted fabrics, but I wanted to use the variety in my scraps, some of which weren't that wide.  I think the results look fine.  I kept the crayons the size in the pattern (cut at 5" x 40", plus the crayon tip cut at 5"), but made just six and turned them vertical, to make a smaller quilt.  I haven't sewn the crayons together yet.  Here they are in rainbow order:


 Not sure I like the red and orange next to each other.  Here I've moved the red over to the right side:


But I think I like it even better this way:  primaries (red/yellow/blue) on the left and secondaries (orange, green, purple) on the right: 


When I put the photo of the pattern at the top of this post, I realized it has the crayons arranged with half the points up and half down:


Not sure which I like better.  With all the points up, it reminds me more of a box of crayons, but I also like the balance of the alternating forms.  Comments on color order and point arrangements welcome!

I don't often make a quilt totally from scraps.  It was a pleasure to handle scores of different fabrics, remembering favorite projects, or wondering how I happened to have a particular fabric at all.  Also very nice to not have to buy or dye any fabric, but just dive in.  

October 25, 2015

Studio break--White Water Rafting in the Grand Canyon


I generally limit this blog to posts about my work in the studio, but it's a convenient place to archive some photos and reflections on a recent trip to the Grand Canyon.  Feel free to stop reading here if you're not interested!

Twenty years ago, David, Jeremy, and I went on a 4-day white-water rafting trip on the Lower Salmon River in Idaho.  We really enjoyed the trip, and were very impressed with O.A.R.S, the company that ran it.  The guides recommended that we think about doing their trip down the Grand Canyon some day--the ultimate in river trips.  It's been in the back of our minds ever since, but we never got around to it.  Then a couple of years ago, we thought of taking a trip to celebrate our 40th wedding anniversary plus our retirements.  Our first thought was to go to Paris, a favorite place of ours since the mid-1970s when we did dissertation research there.  But then we thought of the Grand Canyon.  Paris we could do even if we had to use walkers, but it was probably now or never for a physically demanding river trip.  During the time we were thinking about it, I happened to mention it to a fellow quilter, Janet Jo Smith (we were taking a hike in a state park, the day before a Carol Soderlund dyeing workshop at the Crow Barn), and she said, "Do it!  Take as long a trip as you can, the longer the better.  I did the trip and it changed my life."  If not for her insistence on a longer trip, I would likely have looked for a shorter one, but we did it--signed up for a sixteen day trip on the river, from Lees Ferry to Diamond Creek.  You can see a summary of the itinerary on the O.A.R.S. website; the photo series in the upper right of the page gives you a good overview of the scenery, including whitewater shots.  I didn't take a lot of photos on the trip--I didn't want to be distracted from the pleasures of the experience by looking out for good photos, and I didn't want to have to think about taking care of the camera on the boat or during hikes.  So, my own photos were almost all taken from one or another of our camping sites, and were done more as a record of how daily life was organized.

The trip turned out to be different--and even better--from what I expected.  I knew from the river trip in Idaho, and also from a week-long canoe trip in the Boundary Waters of Minnesota, that I would love the quiet, remoteness, and beauty of the surroundings.  Even though the trip is described as "white water rafting," most of the time is spent rowing down calm water.  (The guides on this trip do all the rowing.)  The advantage of a river trip (or protected lakes like the Boundary Waters) is that you can get right into remote, unpopulated areas without having to backpack.  I did a little backpacking in my 20s--enough to know I didn't find it fun to carry 50 lbs on my back. . .  The expectation of the calming to my spirit of floating through the canyon was certainly lived up to.  One reason I didn't feel like taking photos on the river was that everything was beautiful--one could compose a different photo every six feet, and all would be stunning.  The surprise for me on the trip was how much of the hiking I did.  I knew that hikes were offered on the trip, but I thought I would go on few of them.  I love walking in the outdoors, but I don't enjoy going uphill, and it's hard on my back.  So I figured I'd go on a couple of ambles along the river, if that was possible, and otherwise just sit out the hikes.  But the first full day on the river included a sizable hike up a canyon.  The trip leader described it as possible for all, and reassured us that the guides were there to help anyone who needed it, so I gave it a try.  It involved significant elevation, and much scrambling over large stones.  With helping hands, an occasional push from the bottom, and a kind guide who stayed with me when I needed to rest for a while, I made it up the ridge.  Another day, spurred on by the promise of a clear pool of water and a waterfall, I did a hike that included edging along a cliff, toes in on a ledge about 10" wide, fingers gripping hand-holds in the rocks.  The trip leader had wisely not told us about this part, knowing we might hold back when she knew we could do it.  There was a hike or two most days and I went on all but a couple.  It was also nice to have time to myself in camp on the occasions that I opted out of the hike. I couldn't believe what I was able to do--and enjoyed--in the hiking.  This is the same person who had bannisters installed on the stairways in our house last year because I could feel my balance getting shaky.  My participation in the hikes was possible because of the very knowledgeable help provided by the guides, who could coach us about where to place our feet and hands in difficult spots, and who were always there to encourage and help.  Turns out the water part of the trip (despite concerns from watching the orientation video about what to do if you were thrown from the boat, or if a boat flipped) was the easy part!

Even more fun than the rapids was when they let us jump off a 15 foot cliff into a part of the river they knew was very deep (here's a video of David and me doing the jump; thanks to Lynda Murphy for the video), followed by the chance to swim a rapid (one with plenty of waves, but no rocks near the surface, and an eddy below if we had trouble swimming back to the raft).  The other hard part--almost as challenging as hiking--was camping out for that long, breaking and setting up camp fifteen times, lugging gear up from the shore to our tents, dealing with soggy stuff, the rarity of feeling clean, etc.  But all definitely worth it!  I would recommend this trip (as well as any other trip by O.A.R.S.--they do trips across the country and around the world) to anyone with the interest, time, and financial resources.  It is worth saving up for.

People talk about feeling their life has changed from this trip.  I didn't feel the trip as "life-changing," but it did clarify some things for me:

  • That I really like being out in the natural world--even though I have spent most of my life at a desk, in classrooms, at libraries, or more recently, in a studio.  David and I tend to do vacations in big cities, to balance our daily life in a smaller town, but maybe we'll start alternating with outdoor trips.  And hey, it's nice even to take the newspaper out on my back deck rather than reading it at the kitchen table.
  • That I can do more physically challenging things than I imagined.  My back stood up fine throughout the trip!  (I did exercise regularly in preparation for the trip.)
  • That I can do fine with fewer possessions, especially clothing.  I winnow my closets with each change of season, but when I got home from the trip, I dumped all the clothing out on my bed (by category, as recommended by Marie Kondo), and stuffed three large garbage bags with things I was happy to let go.  The things left are now organized so I can actually see what I have, and I've pared down enough that there's very little to pull from storage at the next change of season.

And now for some photos and details about how things worked on the trip:

This first photo shows a typical camp set-up.  Our six rafts have been pulled up on shore.  While on the river, four of the boats had four passengers and one guide (plus personal bags for those on the boat); the fifth and sixth boats had two staffers and carried much of the other stuff needed for the trip.  The routine when the boats landed at the campsite (usually in late afternoon):  Guests rush off to claim a camp site for their tents, and the staff set up the common area:  folding chairs where we eat dinner and breakfast and socialize in the evening, a cook area where staff prepares meals, an hors d'oeuvres table for those snacks before dinner, purified water to fill up water bottles, and--tucked well out of sight--the porta-potty.  This photo was from one of the earlier days on the trip, when the river water was clear.


The next photo is another camp site, one later in the trip, after a couple of days of rain.  Streams/rivers coming into the canyon from areas of rain brought in mud, which turned the river to a coffee-color for the rest of the trip.


I'm sorry I don't have a photo from a hike that shows how far up we went, or some of the beautiful spots that we went to.  Here's a photo of the group in the middle of a long hike; we're stopped for a lunch break.  One gets very attentive to finding a comfortable rock for sitting. . .
photo by Lynda Murphy


How do you get clean when camping out for 16 days?  You bathe in the river, not as pleasant as it looks here as the water temperature is a steady 50 degrees (because it comes out of the bottom of Lake Powell, the lake created by the Glen Canyon Dam).  Some people brought solar showers with them, and I borrowed one a couple of times, but if you want to use soap, you still have to stand in the river, holding up the shower.


About 30,000 people a year go down the river, so there are strict rules for keeping the area as pristine as possible.  Everyone has to pee in the river (one soon gets used to seeing the females in the group squatting by the river), and poop has to be in the porta-potty.  The porta-potty is always placed in a private area, with a beautiful view of the canyon--the photo below is one example.


And here's the actual set-up: The yellow bucket is for pee, the metal container for poop.  (This was one location where the umbrella was needed for a bit of extra privacy.)  The pee is dumped in the river when we leave camp.  The poop container goes back on one of the baggage boats.  With 24 people on the trip, we needed 7 containers for the 16 days.  Yes, they are all collected on one boat and emptied out only when taken back to Flagstaff.


Back to the campsite--here's an example of one of the places we pitched our tent.  The blue bag at David's feet is his "day bag"--the waterproof bag he would have in the boat with him every day.  The larger white bag to his left holds the rest of his clothing and miscellaneous gear; we each had one of these in camp, but then it was stored on a raft between campsites.  We each also had another large white bag with a sleeping bag and pillow.  Tents, tarps, and sleeping pads were also provided.


Below, another campsite.  Sometimes we set our tent up in a sandy nook, with quite a bit of privacy.  The colored items in the bushes are wet clothes put out to dry.  Often things would dry quickly, but sometimes we didn't get to camp until the sun was setting, and if it was raining (two days of rain out of 16), we carried around lots of wet stuff.  One day early in the trip, I washed out a bunch of our stuff, but getting it all dry was no fun.  After that, I only washed out underwear. . . As in other photos, I'm not commenting on the beauty of the rocks, river, and canyon, but constant awe at the natural beauty was a basic feature of the trip.


Another campsite with a stunning view.

The campsite below was on a lovely wide beach.  There were no tent sites inland, so we were all closer together than usual.  On the other hand, all the sites were flat, a big plus!  One of the challenges each afternoon was finding a place for the tent where we wouldn't roll in one direction or another.


One rock fall that I was able to take a photo of from camp.

Here's a nice photo taken of four of us on the raft: David at the left, then me (yellow rain jacket hood), guide Lars, my cousin Adele, and her husband Mark.  Rain gear was worn not only when it was raining, but also when we were likely to get soaked from big rapids, and then go through a long stretch of shade in the canyon.  It was probably 90 in the sun, but because the canyon is narrow and it was October, there were stretches with no sun.
Photo by Lynda Murphy
To give you a sense of action on the river, here's a video of some rafts going through the biggest rapid on the trip, Lava Falls (video pulled from youtube, not of our trip).

The possibility of a boat flipping on Lava Falls is high enough that we were instructed not to wear our rain gear for this rapid, so that we could more easily swim in the water if we flipped.  Happily, none of our boats flipped on that rapid.  We did have one flip on the trip--not a boat with passengers, but the poop boat, rowed by a very experienced oarswoman who was on her first Grand Canyon trip. Seeing the flip was actually reassuring in a way, as we could see how the other boats immediately went into high gear to pick up the two people in the water (the rower and another staff person), to recover the boat, and then to pull it over to shore to flip it back over--not an easy task, as each boat with all its gear weighs over a ton.  Here's the bottom-up boat on the shore.  The guides have rigged ropes, and enlisted everyone to help turn the boat.

photo by Lynda Murphy
 Here's the boat more than half-way there.  You can see how much gear there is--all so well strapped down that nothing was lost.

photo by Lynda Murphy


Our last evening on the river--a no-host cocktail party up on a ledge above the kitchen area.  Our great trip leader is the third person from the left, Ashley Brown.  And about the meals--they were all great.  Each raft has a large, high efficiency cooler.  Meat and fish stayed frozen until the last day (our last dinner was filet mignon), and there were always fresh vegetables and salad.

One of the pleasures of the trip was travelling together with my cousin Adele and her husband Mark.  This photo was taken on the last morning of the trip--can't believe we don't look more bedraggled!  These were the clothes we wore almost every day.
photo by Kris Dodson
 And here's everyone in our group, just before boarding the rafts for the short trip to the take-out on our last morning--a great group of people.  It happened that David and I were the oldest in the group (68 and 67).  Two passengers were about 30 (children of one of the women in the group); the other young people are staff.  I'd say everyone else was in their late 50s or 60s.  So, the trip is definitely possible for folks our age, but I'm glad we didn't wait any longer!
photo by Jeff Berkey

 I didn't go on the trip looking for inspiration for my own art work, but I have a couple of ideas I might pursue.  I was fascinated by the irregular ridgelines in the canyon.  I can see doing stitching using lines like these:
sketch of ridgelines
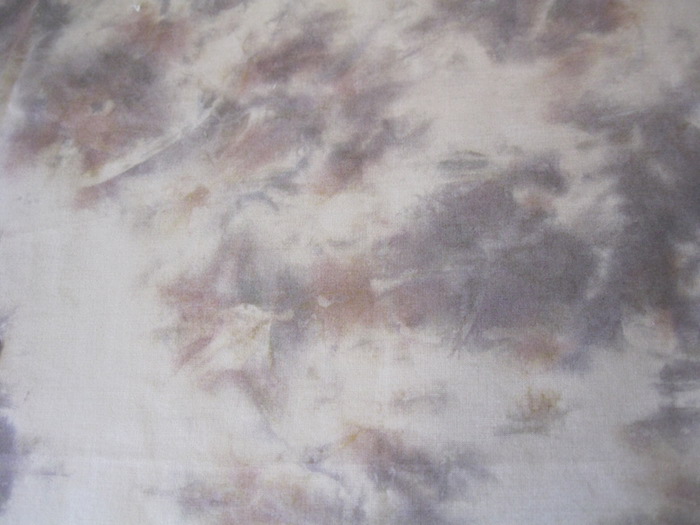
I was also enthralled by the solid cerulean blue of sky against the textured orangey/red of the canyon walls.  Perhaps I'll explore the contrast in fabric.  Would be an interesting dyeing challenge to come up with the contrast of colors and texture.

The Canyon has definitely left its mark on me. . .


 Sunrise on our last morning.


September 28, 2015

Other summer projects

Starting in May of this year, the main project I worked on was Accident 2, still in progress.  On a large, difficult piece like this, I need smaller projects to give me occasional relief, and there were also stretches where I was waiting for a dyed piece to batch for a week or two when I could turn to other things.  This post will give you a glimpse of the variety of other things I've worked on this summer.

I needed bandanas for myself and some friends going on a camping trip, so I decided to dye some of the ready-made bandana blanks sold by Dharma Trading Company.  I really liked six out of these seven, and dyed several others after this as well.  (Double-click on any photo to enlarge it.)


I used two different thermofax screens (done from photos of tree bark) to see if I could print on a T-shirt.  Came out quite nicely, although I like the back (blue/black) better than the front (red/black)


I made a few baby quilts, starting with a Cobblestones quilt from Kevin Kosbab, The Quilter's Appliqué Workshop.  I stayed close to the color scheme shown in the pattern, which I liked very much.


The back is hand-dyed fabric, made by pinning the fabric to a clothesline, and dripping two colors from the top.

 Fun to get a photo of the baby on the quilt!

I miscalculated how many squares of color I would need for the cobblestones, so I had a lot left over.  I used them in a "disappearing nine-patch" technique, that yielded the central column for a second quilt, with side panels using other leftover fabric.  When I started, this was going to be the back for the first quilt, but I liked it enough to make it the front of a second quilt.


And its back is another piece of hand-dyed fabric, this one shibori-dyed around a large piece of plastic pipe left over when our main sewer line had to be repaired earlier this year.  Dyers are always on the lookout for tools!


When I was on Whidbey Island earlier this summer, visiting my friend Mary Beth, we went to a quilting shop where I found this lovely turquoise fabric for the background of another cobblestone quilt.  Mary Beth encouraged me to "shop her stash" for some small pieces of novelty fabric, to use for the "cobblestones."  I decided that circles of these fabrics looked better than the improvised squares.

For the binding of this one, I put on a "faux-piped" binding, orange for the piping and light blue for the binding, both fabrics I happened to have on hand.  I like the way this finished.


I also finished the hour-glass quilt that I started this spring (see this post for details on the pattern from Modern Quilt Studio and some early choices).  I finished this with a "pillowcase binding," no batting, as I made it to use as a tablecloth for the large table at my synagogue where we gather for Shabbat prayer when we have a smaller group.


Here's a glimpse of the backing, which is one large piece of hand-dyed fabric.


I saw a pattern for a small zippered pouch on the Crazy Mom Quilts blog, and it looked like a fun way to use up small pieces of some favorite fabric.  I actually made six--I sent one away before I thought to take a photo.  I think I have to make a few more. . . 


That got me in a sewing mode, and I decided to try an Anna Maria Horner dress pattern that I'd bought a while back.  I've tried making a few garments in the last several years, but am usually disappointed with the fit or how it looks on me.  But this one came out quite presentable!  I used only fabrics I had on hand; the color of the side panels is not optimal.  But when worn, they're less visible.  Great pockets, and a comfortable fit overall.  

My favorite part was learning how to do a loop buttonhole with pearl cotton (back neck closing):


Moving over to knitting, I finished an afghan I started about 6 months ago.  Since retirement, I've been watching an hour (sometimes two) of TV in the evenings, so I've been getting a lot of knitting done!  I don't think I could watch TV without it.


 When I finished that, I needed another knitting project.  I found a modified log cabin pattern in Mason-Dixon Knitting, their "Moderne Baby Quilt."  I've changed the colors and dimensions a bit, otherwise following the pattern.  Here it is about one-third done.


And finally, I'm in search motifs to use with stamping or screen printing--something I've been wanting to do for a while, but have yet to settle into.  One thing I did this summer was to take some sketches of mugs that I did a while back, import them into Photoshop and try some arrangements and colors.  I would like to take these further at some point.


So, along with Accident 2, that's how I spent my summer!