Showing posts with label landscape. Show all posts
January 25, 2012
"Late March"
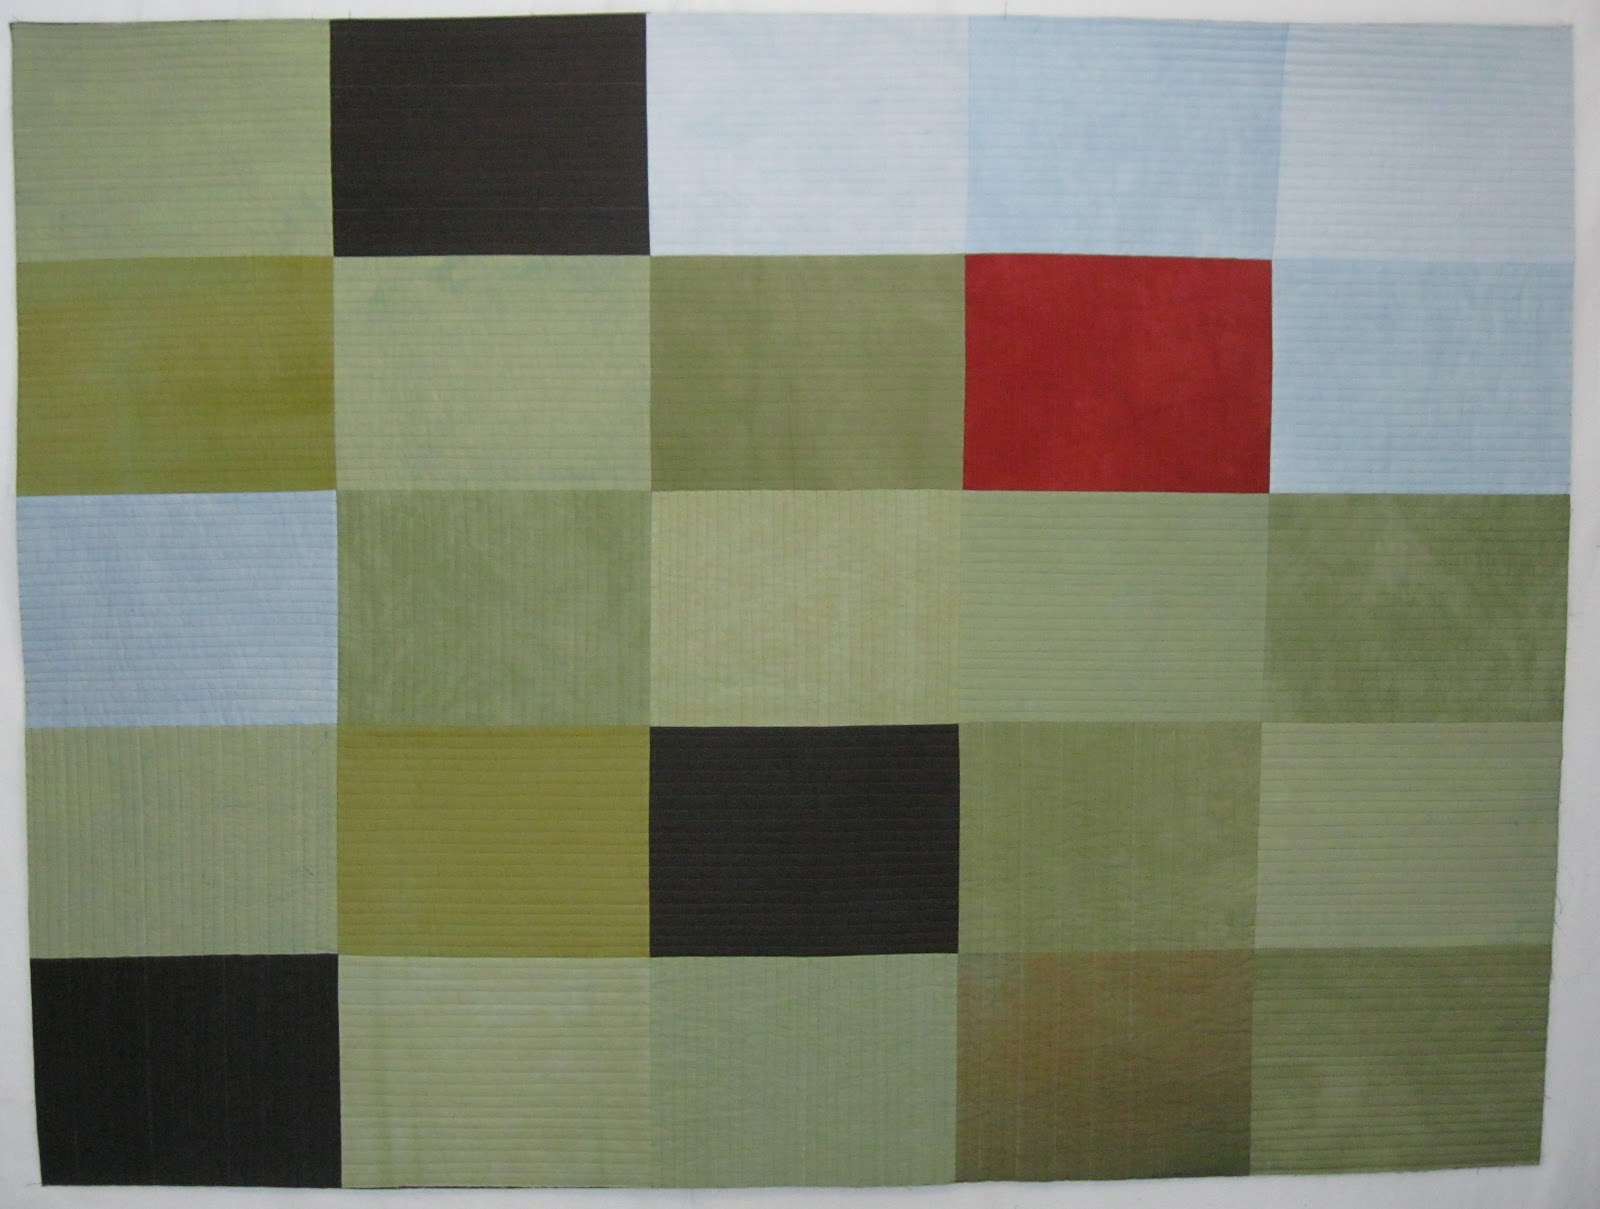
This quilt has been in the making for seven years. In winter of 2005, I signed up for a Design Workshop with Weeks Ringle and Bill Kerr that would be held that June. We were told to come with three ideas for quilts. My first idea (and the only one, until about a week before the workshop) was to do something about the midwestern landscape in which I live. Toward the end of March, I drove out into the countryside, and took a lot of photos. I bought fabric in the range of late-winter colors that I held in my mind. (Missing from the memory is the predominant straw color that I see when I look back at the photos--which I find interesting, but didn't made me change the palette.) Shortly before the workshop, another idea took over, and I worked on that quilt, "Loss," for three years. Not long after I finished "Loss," I went to a multi-media workshop at Arrowmont, and, using thick layers of pastel on 9x12 sheets of pastel paper, I made a kind of trial version of a quilt, going back to my idea of landscape. You can see it in the second photo of this post. My husband and I both liked the piece so much that it's been hanging in our living room ever since. With the confidence from the Arrowmont workshop, and the experience of a great dyeing workshop with Carol Soderlund, I then went on to create hand-dyed fabrics for a cloth version of the composition. Making the quilt top was simple once I had the fabric, but I stalled for a long time wondering about how I would quilt it. After many samples and consultations, I decided on parallel straight-line quilting, with some changes of direction from one area to another. I finished the quilting about a month ago. But, alas, I immediately saw two problems: First, I had the quilting lines in the light blue "sky" going vertically, done in order to contrast with the horizontal "fields." But it definitely looked wrong, and I decided to take out all the stitching in that upper/right area, and to re-do it horizontally. As long as I was doing that, I would correct the second problem as well: The black batting I had used in the quilt was showing through the light blue fabric, shading it down in a way I didn't like. (Why black batting? I was doing in-the-ditch quilting in the seams, and was afraid some of the batting might peek through. I thought black would be a better option in case that happened. But I wasn't thinking of what it would do to the light blue section.) Here's a photo that compares black batting and white under the blue fabric--after I had taken out the stitches:
As you can see, definitely better with white batting! So. . . how was I going to get the black batting out and white batting in? As luck would have it, I had to make a trip to Chicago a couple of weeks ago, and spent an evening with Mary Beth. As we talked about one or another option, she had the brilliant idea of leaving the black batting in place, but slipping in a piece of white cloth over it. Same benefit! And a much more feasible method for quilt-surgery. So that's what I did. I used the white fabric that was the base for the hand-dyed fabric, and I starched it heavily, to aid in sliding it into place. Here's one piece placed over the lower section of blue.
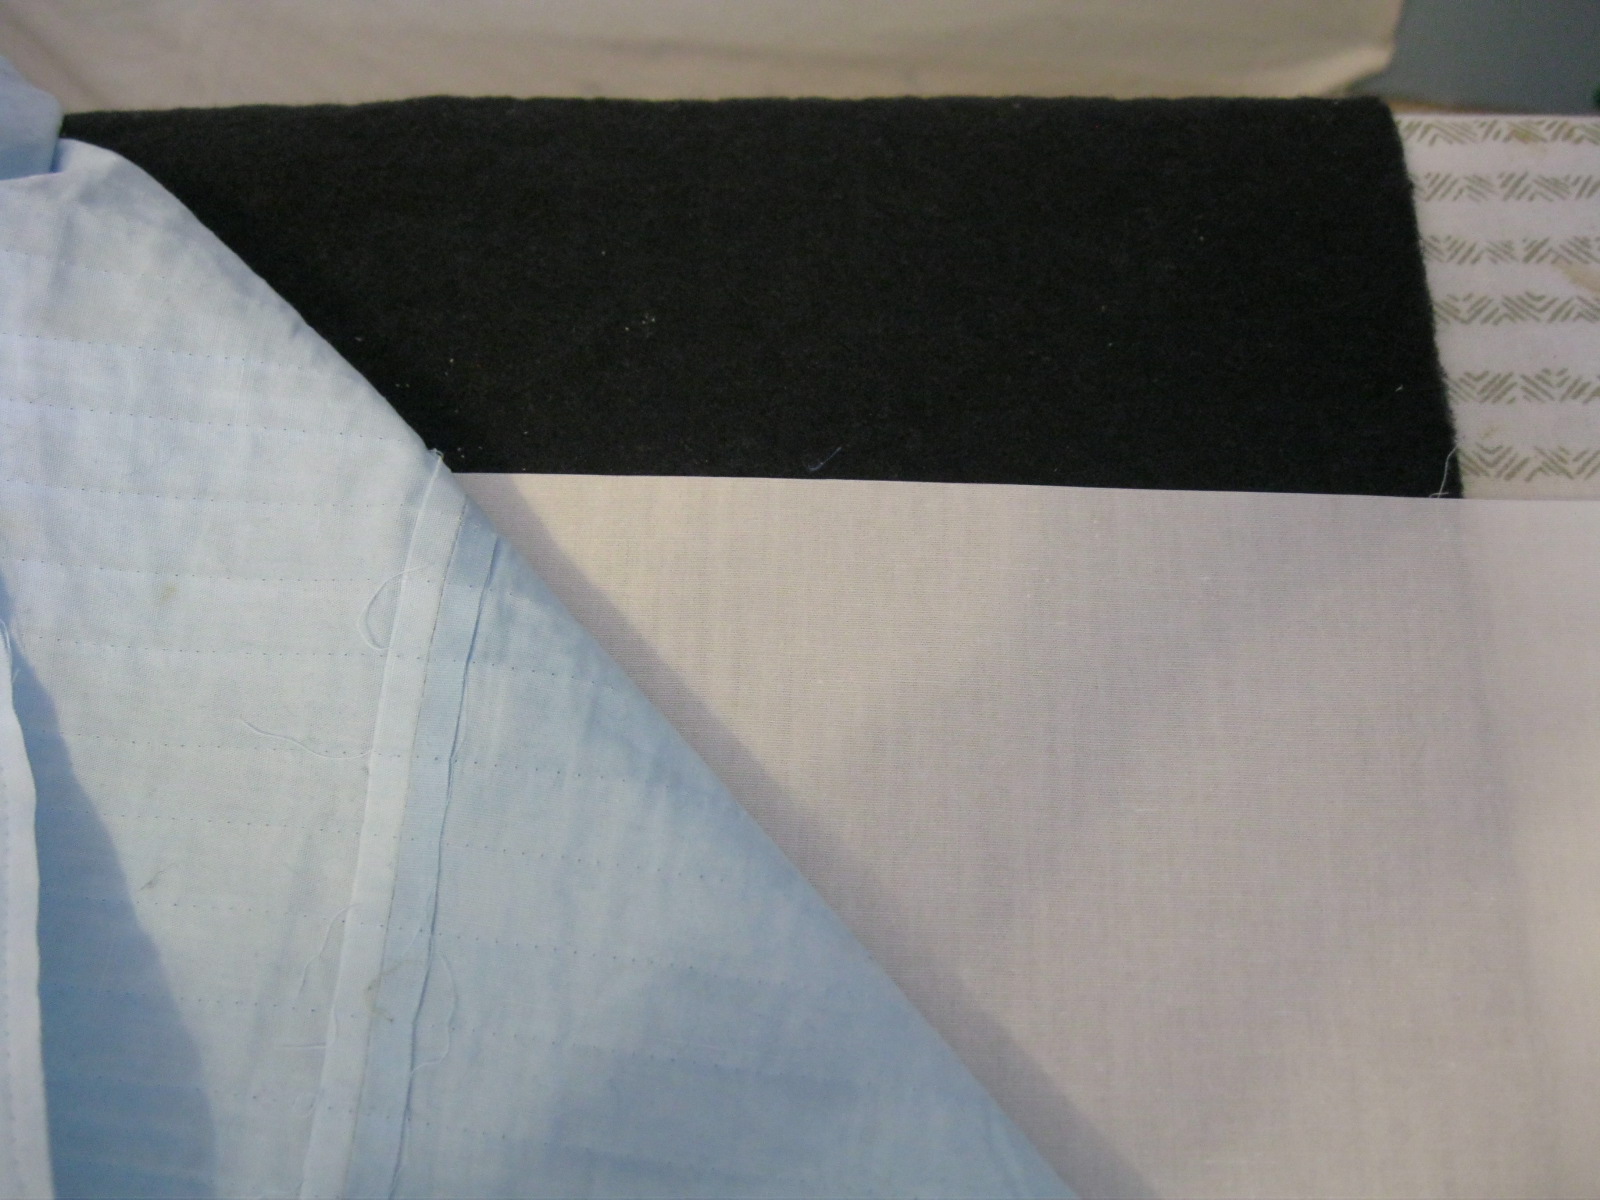
Then I placed another piece over the upper section. (Using two separate pieces was easier than trying to cut one piece in the precise "L" shape needed.)
And here's the new sandwich, pinned and ready for quilting:
EXCEPT. . . As I pinned (using straight pins, I'm not sure why), I apparently was pricking my finger from time to time, leaving spots of blood on the fabric. (They may be visible if you double-click to enlarge the image.) So, I stopped and wiped out the blood with cold water, taking care not to stretch the fabric as I did so. Waited until it dried, put in safety pins, and then re-did the quilting with horizontal lines. Better!
Some details (the lines are about 3/8" apart):
I used Invisafil thread, a very thin polyester thread that I like a lot. I used dark khaki through the whole quilt, and the thread blended well in each area--though when I re-did the quilting in the blue upper corner, I changed to a pale gray thread instead.
On the back, I used a green Kona cotton that I over-dyed with brown, and a faced binding with curved corners, method from Mary Beth--it really makes a nicely tailored corner.
November 29, 2010
Midwestern Landscape: in pastel and cloth
In the summer of 2008, I did a week-long mixed media workshop at the Arrowmont School of Arts and Crafts. One of the results of that workshop was this pastel work--layers and layers of pastel on 9x12" rectangles of paper. I was working with an idea I had long had for a quilt about the midwestern landscape in late March. I like this work quite a lot; it hangs on the wall in our living room.
One of the important results of the Arrowmont workshop (where I also did some work with water color) was that it gave me confidence that I could mix colors in order to get the vision of color I wanted, which led me to learn how to paint fabric and to take a workshop on fabric dyeing. This past summer, I finally got around to dyeing fabric for a quilt version of the landscape. I haven't yet quilted it--still thinking about what to do--but here's the top (each block is again 9x12", total dimensions 45x60"):
And here's a table runner that I made this weekend, with smaller blocks, 3x4, for total dimensions of 12x44"
For the back and binding, I used some sage-colored Kona fabric that I overdyed with greens and brown.
I quilted with random, narrowly spaced wavy lines, which I like. Perhaps this would work for the larger version as well.
Looking at a detail of the front, you can see one problem with the quilting--the right/left edges of the blocks have gotten distorted out of line by the quilting. Some people recommend quilting the lines all in the same direction to avoid this. Others recommend alternating directions. I tried both ways in a sample, and got distortion with both methods :-( One other thing to try is even more meticulous pin-basting than I already do, perhaps taking care to pin right in the seams. If anyone has suggestions for me, I'd love to hear them!
August 8, 2010
A week of work
My main focus was to create fabric for a quilt version of a pastel piece I did a couple of years ago at a mixed-media workshop at Arrowmont (each rectangle is a 9x12 piece of pastel paper, covered with layers of pastel):
(More on this workshop and other non-quilt work produced there in this post, on another blog I contribute to.) Here are the fabrics most likely to go into the quilted version, two different shots:
I think I'm going to try one version using the fabric just as it is, and then another version in which I add painted layers to the rectangles, to get more variation in hue/value across each piece.Along the way, I also created the beginning of a stash of hand-dyes for further quilts in the "Pine Grove" palette, which is close to the landscape palette, but more far-reaching. So, happily, virtually everything that is rejected for the landscape project can be included in the pine grove pile. Almost all of these landscape and pine grove fabric pieces are flat-dyed solid (as explained in the previous post). I also did three pieces of grey mottled fabric in a value parfait (according to Ann Johnston's instructions in Color by Accident), intended as fabric for stones:
And I tested out a couple of small pieces of linen (flat-dyed solid) to use as background for appliqued stones. (Double-click to enlarge, so you can see the texture here--quite nice!)
Now I plan to take a week off from dyeing. I'd like to cut rectangles for the landscape quilt, to see if I need other greens, and I'll also select further colors for the pine grove palette, adding in a variety of teals, some bronze-reds, and more gold.
Subscribe to:
Posts (Atom)


