I've had the pleasure of giving three quilts as wedding presents in the last six months. I'll show them in the order of the weddings:
The March quilt was made from a pattern in Modern Triangle Quilts, by Rebecca Bryan. Here's a photo from the book:
 |
| pattern by Rebecca Bryan |
And here's the version that I made.
 |
| you can click (or double-click) on any image to see it larger |
After consultation with the prospective bride and groom, we changed the background color to a dark indigo (dyed with Dharma's "indigo" color), and tweaked the colors in the blocks include some blues and black. The blue fabrics I used were also hand-dyed (lighter values of the same color used in the background), while the rest were commercial solids. I used the pattern for guidance on placement of the four large triangles (16" tall versus the rest that are 8") and for the approximate proportion of background to blocks. Although the blocks have an improvised look to them, they are actually done according to specific instructions, with some paper-pieced. I thought I'd start out with the blocks in the book, and then branch off into improvisation, but it was interesting to try out the different block patterns, so I stayed with those. A friend said the quilt reminded her of the pennants that sailboats fly, so I called it "Regatta." For the back, I dyed fabric in one of the yellow/gold colors, and incorporated some leftover triangles, both pieced and plain.

The July quilt started some time ago as a "travel appliqué project." I like to have hand-work to take on trips, to help pass the time in airports, on planes, or in the car. In the car, knitting works best; if it's a plane trip, I bring appliqué. But it has to be "one-piece" appliqué, something where I can baste on one large shape and sew, without having to carry around a bunch of little pieces that go on one at a time. (Actually, even when I'm not travelling, I prefer the one-piece variety.) I bought this Roxanne Products pattern some years ago, five gingko leaf patterns based on Japanese family crests:
 |
| pattern by Roxanne Products |
I've been working on one or another of these blocks for a few years, thinking I would likely put them into a wall hanging, as shown in the pattern. But as I was finishing up the last block this spring, I got news of an upcoming July wedding, and I thought it would be nice to use the blocks instead in a lap-sized quilt to give as a present. I purchased several yards of a black and gold batik fabric that I planned to use for the background, and brought everything to the four-day spring retreat of the Quilters by Design group. I was thinking that I'd lay out the blocks as shown in the pattern, using the batik as background, and then just have a large block of background at the bottom. No one was enthusiastic. Ideas were offered and tried out. Forget the gold/black batik--I changed to the same almost-solid-black batik that I used in the appliqué. And forget the block layout in the pattern. As we moved blocks around, someone called out "Posh Tot!" referring to a
Blue Underground pattern by Christy Marnell (an original member of our group) that many of us have made. Here are a few that I've made as baby quilts:
Yes, the gingko blocks are very striking when laid out that way! A real tribute to how opening one's work up to critique can result in significant improvement :-)
I did free-motion quilting within the blocks, and straight-line horizontal quilting on the left and right panels. The black/gold fabric found a home on the back of the quilt.
Finally, the quilt for the August wedding. This one used a pattern by Heather Harding called "Talofa Samoa," made with fabrics for Hawaiian shirts.
 |
| pattern by Heather Harding |
A couple of years ago, I saw a quilt from this pattern made by my friend Kathy Durochik, using fabrics by
Marcia Derse, fabrics I like very much and have used in smaller pieces, like the first table runner in
this post, as well as in table napkins (which led me to screen print
my own fabric to make napkins). I loved Kathy's version of the quilt, and when I was later at Marcia Derse's shop on Whidbey Island, I bought about 20 half-yard pieces, planning to try my hand at the same thing. Here's Kathy's version:
 |
| Kathy Durochik's version |
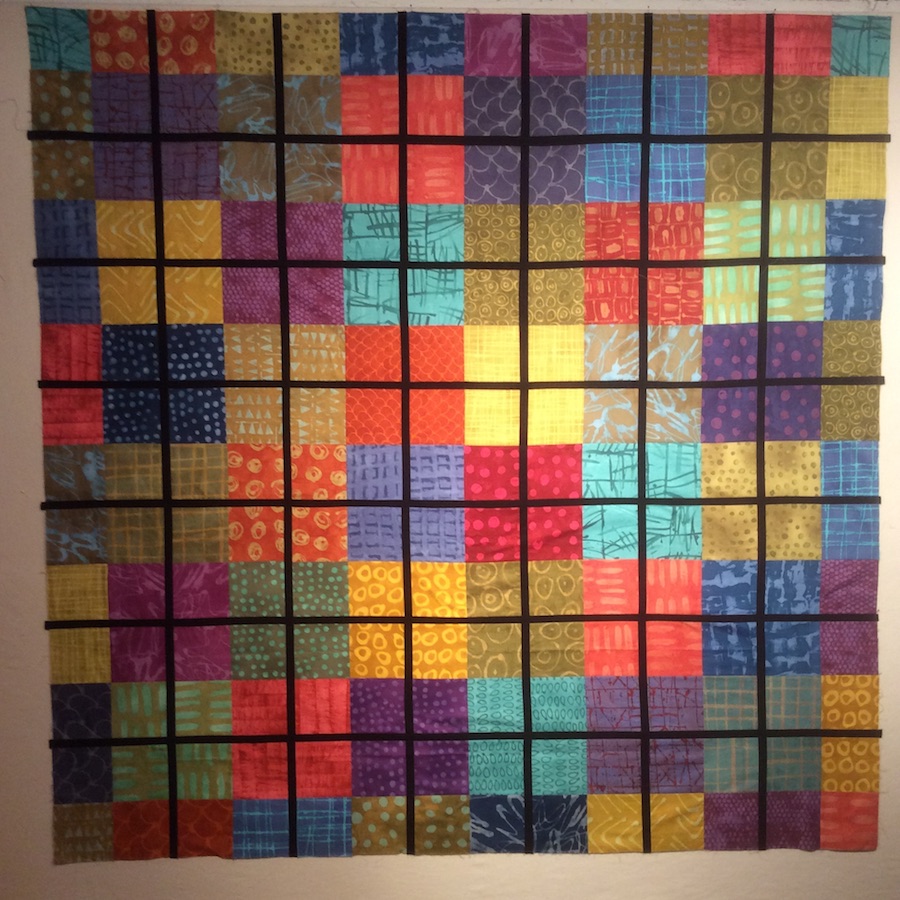
And here's my version. The pattern is such a nice vehicle for Marcia Derse's beautiful fabric.
For the back, I hand-dyed some green fabric (which turns out to be a favorite color of the bride's). If you click on the image to enlarge it, you'll be able to see the quilting, more visible on the back. This one I took to a long-armer to do an overall design.
* * * * *
All three of the recipients (two brides, one groom) were people who had grown up knowing my son Jeremy, and one of them was an especially good friend. It was a great delight to be included in these celebrations, each of them thoughtfully put together, permeated with the personality and commitments of each couple. But by the third, all so close together, I couldn't help but feel a deep sadness too, that Jeremy didn't make it to this stage of life. . . Sitting here thinking about this, it occurs to me that I could still make a wedding quilt for Jeremy, imagining what he might like. I think his favorite color would still be blue.