It is almost six months since I participated in a week-long workshop with Claire Benn at the Crow Barn in Ohio. The workshop gave me a chance to work on multiple ways of producing graphic shapes and lettering on fabric. Most of the examples above will reappear below, as I describe the work.
The workshop was called "Graphics and Graffiti." Most of the sample work that Claire took us through had to do with ways of using letters/words, but we were also encouraged to do graphic work more broadly. Most of what I did falls into three categories: writing/marking with ink (on both paper and fabric), screen printing with shapes drawn from my "Regret" quilt, and using a paper lamination screen to print a large block of narrative text.
Writing/marking with ink:
The first day of the workshop was devoted to working with paper, using markers and then various implements with India ink. Many of the exercises we did were inspired by the work of
Denise Lach, who takes calligraphy into the world of abstract art. Claire had us choose a phrase or sentence, and work with that over and over again throughout the day. Several years ago, I asked a rabbi if he had a blessing for someone for a broken heart. He replied, "The Kotzker Rebbe said, 'There is nothing so whole as a broken heart.'" This sentence touched me deeply, and it's the one I chose to work with for these exercises. My favorite version is the one below (which came late in the process), in which I formed the letters of the word broken with the fat end of a wooden shim. The letters B, R, and O are in the top line, K, E, and N in the bottom line.
Screen printing with shapes drawn from my "Regret" quilt
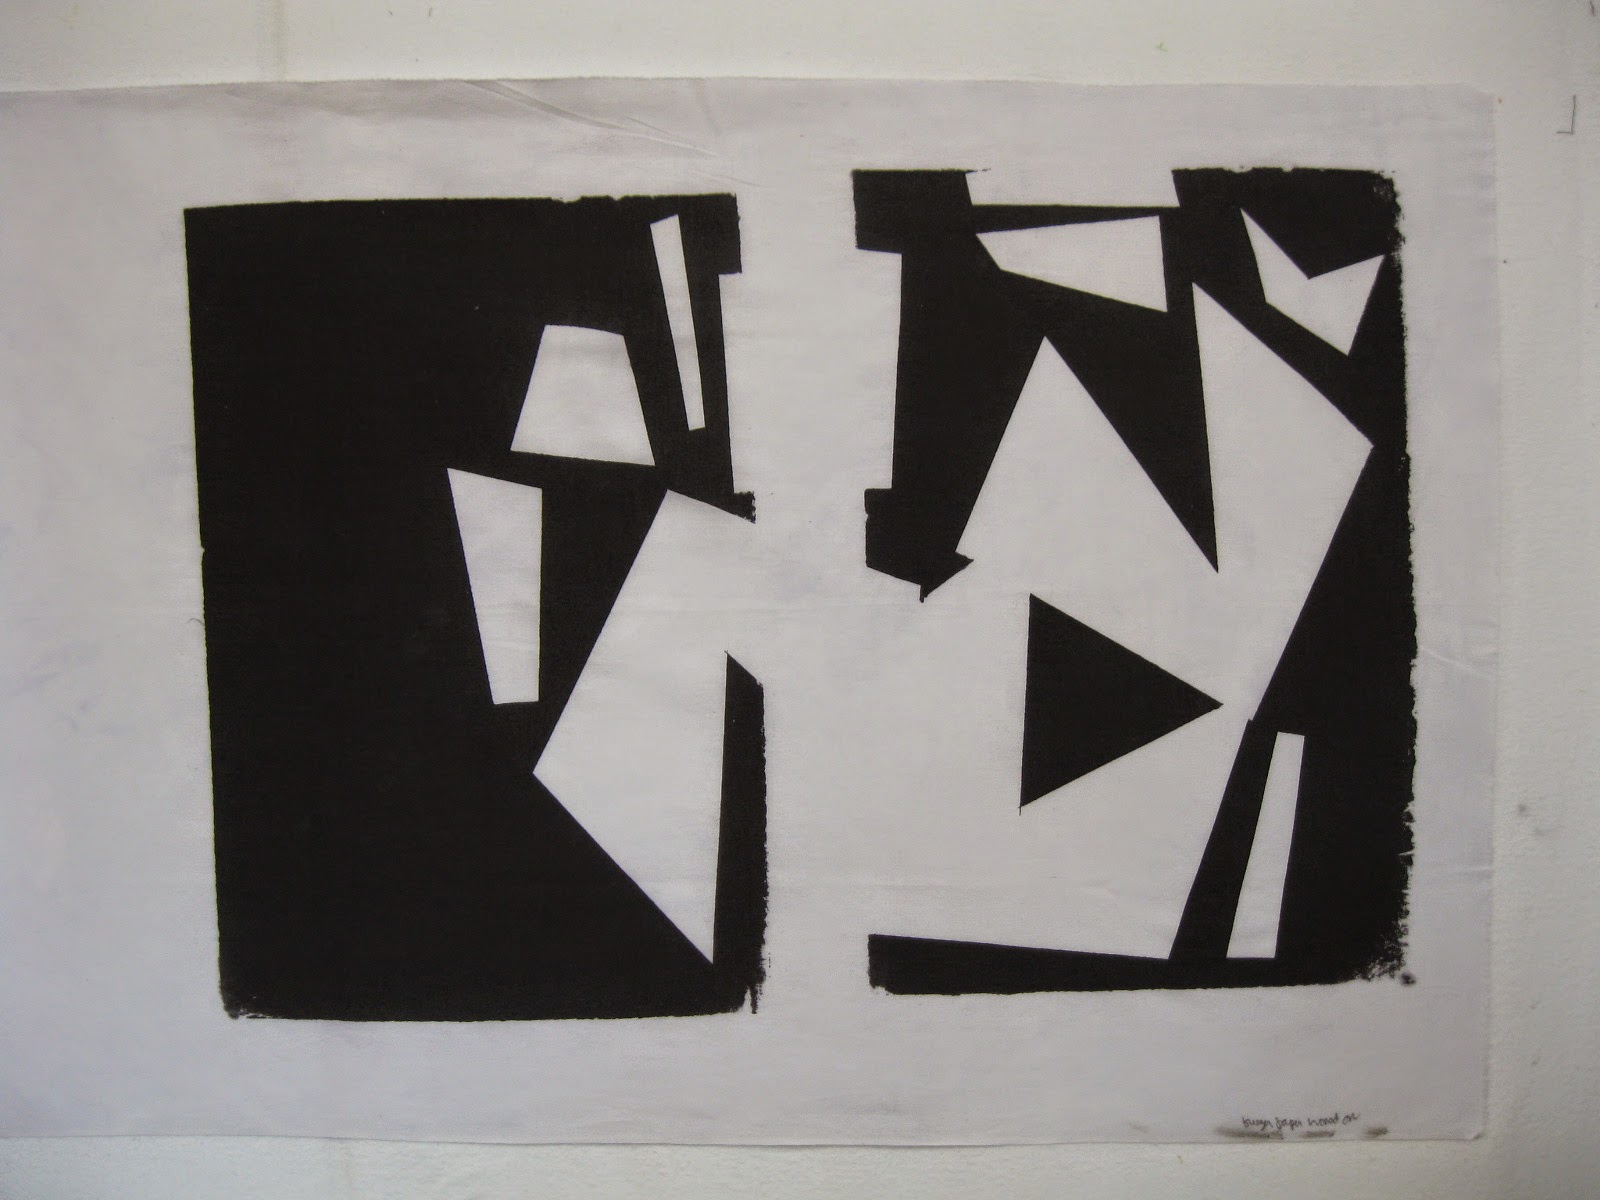
I have long been drawn to repeated but varying abstract patterns, with some favorites being Matisse cutouts and Kuba cloth. Early on in my quilting, I thought of replicating such a design in applique, but decided I would rather wait and come up with my own repeated shape. Now, years later, it occurs to me that the shape I used in my quilt on
regret might also work as a smaller repeated shape, with perhaps some other related shapes added in. Here's an early attempt: the shapes were cut out of freezer paper, adhered to a silk screen, and printed with black thickened dye.
For this next piece, I used one large piece of freezer paper, with shapes cut out of it and set aside; pulling the dye through the shaped holes gave me black shapes on a white background. The photo was taken after I had made repeated pulls of the same screen; you can see some of what just one pull looks like on the far right.
I added another pull or two for more overlapping black shapes, and then added some splotches of yellow. I like this piece a lot--not so much as a whole composition, but as material to cut up to put on note cards or to be used in some other kind of composition.
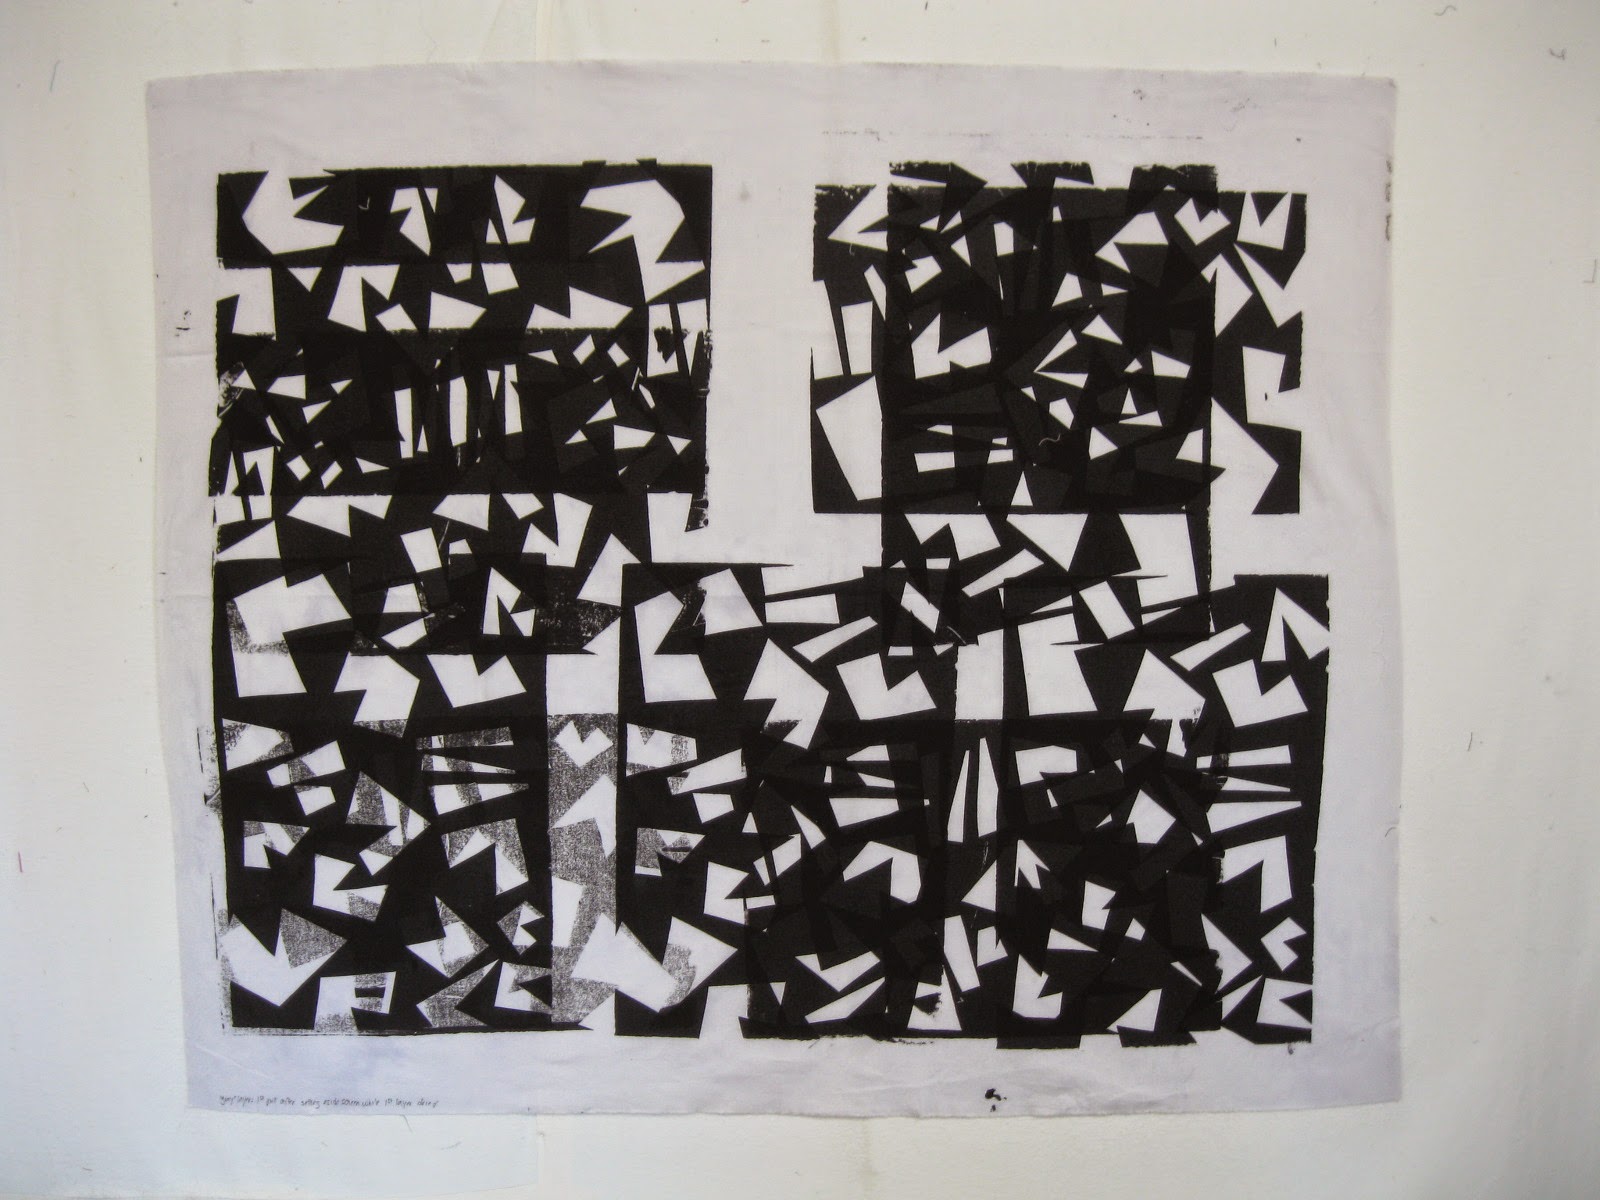
Here's another screen made with the freezer paper shapes set aside from the piece above, screened five times on a large piece of cloth.
Then I went back over with the screen turned 90 degrees from the first pull. When doing multiple layers like this, you need to wait for the first layer to dry a bit before printing again. I didn't realized that the first pull after the wait would come out lighter--seen in the bottom left corner in the photo below.
This mistake led to a lovely variation in texture.
Using a paper lamination screen to print a large block of narrative text
One of the techniques totally new to me was making a printing screen out of a piece of polyester sheer fabric, with no frame. This method allows you to make a very large screen, as the fabric is about 54" wide and as long as you want. It's called "paper lamination" because the basic process involves making paper stick to the back side of the sheer, in whatever design you put on with liquid matte medium. So, it's a great method for making a screened image of handwriting, or any kind of line drawing. Below is a photo of part of the screen that I made. Most of the image is looking at the front of the screen; I've turned over the sheer on the left side, so that you can see the back, with the paper stuck on. (Double-click on the photo to see more detail.) Sorry if this isn't clear--it's the kind of process that is better demonstrated than written about. Just trust me that it makes it very easy to do a large screen with direct application of line drawing.

The text I'm using here is part of a narrative of the night Jeremy died. I wrote the narrative shortly after the accident, in 2004. Writing down what happened helped me stop going over and over it in my mind. Last winter I started a quilt that incorporated the text of the narrative, which I stamped into a mud-colored cloth.

The letters are 3/8" high, resulting in a piece that is 35x48." (I haven't yet posted about this quilt--I'm waiting to make a few final decisions about it.) As Claire explained the possibilities of working with a paper laminated screen, it occurred to me that I could work again with the narrative of the accident, but use a very different method, to a different purpose--where expressiveness would be more important than legibility. I made a screen, trying out different kinds of handwriting styles: script, print, all caps. I printed two versions, one with a range of color on white cloth, and a second all black on gray cloth. I especially like the potential for expressiveness in the multi-color one.
I have recently begun the planning process for a very large piece (about 80x90") done with this process.
And a couple of other things:
Flour paste resist is another possibility for a large piece using the accident narrative. This method, too, would allow me to work very large. This technique involves spreading a layer of a flour/water mix on the cloth, and then scraping a design in with a skewer or other instrument; thickened dye pulled over that leaves black letters on the white background of the cloth.
Another way to get black lettering is to use a soy wax resist on black cloth and then discharge the black, leaving only the lettering that stays under the wax (which is washed out after the discharge process). I tried several versions at the workshop, of which this is my favorite:
But I don't so much enjoy working with the wax, and the paper lamination and flour paste resist give me plenty to work with.
Many thanks to Claire Benn for a great workshop! She'll be doing a similar workshop again this fall at the
Barn, if you're interested, as well as a second one
on "Exploring Gray through Surface Design. You can see more of Claire's work here.
If you've never been, the workspace at the Crow Barn is great, and the whole set up is very conducive to positive relationships with other students as well as with the teachers and staff. Here I am with Stephanie Meisel and MJ Kinman, both of whom I first met at a Barn workshop taught by
Dorothy Caldwell. Students tend to come back to the Barn, so paths can cross again in later workshops, which is really nice.