August 31, 2019

Trimmed edges put to use


I recently trimmed off the edges on some fabric I'd printed up for napkins. Put the strips in the wastebasket, but then pulled them out. Cut some 1.5" squares and made up a 4" coaster.  I've made coasters like this before from commercial fabric I have on hand.


Not surprisingly, the coaster made from screen-printed leftovers is even nicer. . .

August 12, 2019

Daiwabo!

My goal is to spend mornings in the studio, leaving other things for the afternoons (errands, desk/computer stuff). Working on the intricate piecing in Jeremy's wedding quilt is very demanding, so I've limited it to the making of one block a day, which can take me anywhere from 1-2 hours. That leaves me time for other sewing, something simpler.  For the last month or so, that time has been spent working with daiwabo fabrics, a Japanese style of fabric I've used in some other projects, for example the placemats in this post, and the dresser cover here. I love the subtle range of taupes/tans/browns, even though I am not drawn to brown as a color either in other commercial fabrics or in hand-dyeing my own.

My friend Kathy decided that she was never going to use the large collection of daiwabo fabric that she had collected. I told her that if she would like to have someone else work with it, I would be happy to take on her collection. So, a sizable bin of these beautiful fabrics came home with me after our last quilting retreat in April. Thank you Kathy!! (Click on the image below for a better look at the range of texture/designs.) 


My first thoughts about using the fabric are centered on making something for Kathy. She decided on a tablerunner, using the pattern "Get in Line" from our friend Amy Walsh, which I used for the table runner (link above). Cutting one 1.5" strip from each of the fabrics would give me plenty for a tablerunner for Kathy's dining room table. After cutting a few of those strips, I decided to line up a couple of other projects using these fabrics, and to do all the cutting at the same time, since I was taking out each fabric anyway.  Here are the three sets of strips, cut to 1.5" for the table runner, 2.5" for a second project, and 5" for a third.


Here's the start of the runner, about 1/3 of the top done. To work on this, I'm using a small, secondary design wall that is in a corner of my studio.


The second project is a pattern called "Play a Card," by Zen Chic.


I'm using a creamy white linen for the background and narrow strip between the daiwabo rectangles.


I have cut and sewn together enough blocks for a lap-size quilt, done while visiting a friend in Wisconsin. Sewing the blocks together into the top will be a good project for when I'm travelling again.  It could be our annual Quilters By Design retreat in the spring, or perhaps when I visit my sister in Arizona in the winter. (I've left a small portable machine at her house so that I can sew while visiting.) Sometime before that, I'll lay out the blocks on my design wall and mark them so I know the order to sew them together, but I can't do that until Jeremy's wedding quilt is off the design wall--likely some time this fall.

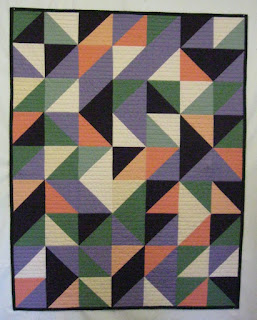
The third project is another lap-sized quilt, made up of half-square triangles (HST).  Here are photos of a couple of baby quilts I've done with HST blocks in the past. The blocks were placed somewhat randomly and then edited into a pleasing design, a method I picked up from Katie Pedersen.


-->


I'm thinking the daiwabo fabrics will give a quite different look, but beautiful.  Here's one block along with all the squares I've matched up for blocks. (Two 5" squares cut on the diagonal will yield two 4.5" HST blocks.)


And here's four blocks randomly placed on the design wall. Playing around with these blocks will definitely be fun.


And a couple of weeks ago, I used a few mornings' time to print up another batch of napkins. I'll get two napkins from each of these printed lengths.


Finally, something that only took a few clicks on the computer: I couldn't resist purchasing a yard of a "Palette Stacks," a new fabric from Marcia Derse.  Bowls! And I love the color work. The fabric is now sold out, but a new supply is expected in September.


I'll probably use this for a whole-cloth baby quilt (using just the one, whole piece of fabric), and try out some quilting in response to the design.  Or maybe I'll just staple the fabric as is to a wood frame and hang it in my studio. . . 


August 11, 2019

Editing a composition

I've been working steadily on Jeremy's wedding quilt, and have gotten to a point that I find myself thinking of as the editing phase.  The word "edit" is more often used for text, and I am very familiar with the text-editing process from decades of academic writing. It can be more tedious than the earlier stages of figuring out the main ideas of what one wants to say, the first formulation of those words into some kind of organized prose. But sticking with it, carefully re-considering each word, sentence, paragraph, is crucial to successful writing--writing that someone besides the author can readily understand and that will be convincing. And editing has its own pleasure--crafting and re-crafting the text so that it works to carry the message.

As of August 1, I'd gotten this far on the quilt. Although it's difficult to tell from the photo, the quilt will be 9 rows of blocks, of which I've completed 8--empty row in the middle. There are about 7 blocks in a row.  None of the blocks are sewn to each other yet, so I can still easily move them around.

I started working on the quilt from the top, but then changed to working from the bottom, to give me a bit of a break on the intensity of piecing in the little colored pieces. When I got to this point, with just one more row in the middle to make, I decided stop with new blocks and go back to the top rows, to some areas that I wasn't happy with, because each little bit of "confetti" in that middle row will be decided on in relationship to the bits above and below it. I've marked up the photo below on the left, to show the problematic areas. To get a better idea of what the whole top will look like, I laid some plain blue squares of fabric in the center row on the design wall, and just placed some bits of colored fabric on those squares; nothing in that row is pieced.  The photo on the right below shows the quilt a few days later, after I had ripped out the problematic sections and re-sewn. I'm happy with the changes, though now I see other areas to further edit before I go on to the last un-sewn row. You can click on the photo to enlarge it and see what I've typed in, but in case they're still not readable, I've written them below the photos. (Both photos taken in natural daylight, but different times of the day. The actual depth of blue is about half-way between these two photos.)


  • Top-most oval: Take out some colored shapes so they're not in a line
  • 4 ovals below that: Replace large blue sections with blue pieced sections (that is, replace one or two large pieces of blue with more like 4-8 pieces)
  • 5th row marked off with white lines: This row is still very rough--no sewing yet.
As I did this detailed editing, it occurred to me that technology has come to the aid of editing art compositions as it has to editing written text. Editing text with the assistance of a word processing program is so much easier than a typewriter! For my work in textiles, I don't use the computer very much, just occasionally some preliminary sketching and color work with Photoshop. But I use my digital camera all the time, especially for a piece as large as this one (about 60x90"). The piece is so large that I can't step far enough back in my studio to get a good view of it from a distance, to see how it's all working together. Taking photos--and having them immediately viewable because of the digital technology--is a big help. Another digital tool is to take a photo also in black and white, to check how the range/placement of value is working. Here's the quilt, same as above right, with a black/white version as well:

-->


More editing to come, before I move on to that last row of piecing.